
By default, your WooCommerce checkout page template will be based on your site’s theme. The checkout page has a significant impact on visitors actually clicking the button to complete their purchase. It’s not surprising that any time spent customizing the checkout fields will have an impact on your conversions.
1 out of 5 shoppers abandons their cart because of a complicated checkout process. –Baymard Institute
There are a number of factors that can lead visitors to throw in the towel before checking out. For example, a checkout page requesting too much information complicates the process. Visitors who don’t feel your site is secure are reluctant to share their credit card details or maybe they encounter unexpected shipping fees. All of these items can lead to cart abandonment and lost revenue.
In the United States and Europe alone over 260 billion dollars are lost each year due to cart abandonment. The good news is you don’t have to be part of the statistic.
In this article we’ll show you how to improve the checkout flow in your store by editing the WooCommerce checkout page.
Customize the WooCommerce Checkout Page
First things first you’ll need to know where to edit the checkout page in WordPress. The following are two ways to edit the checkout page.
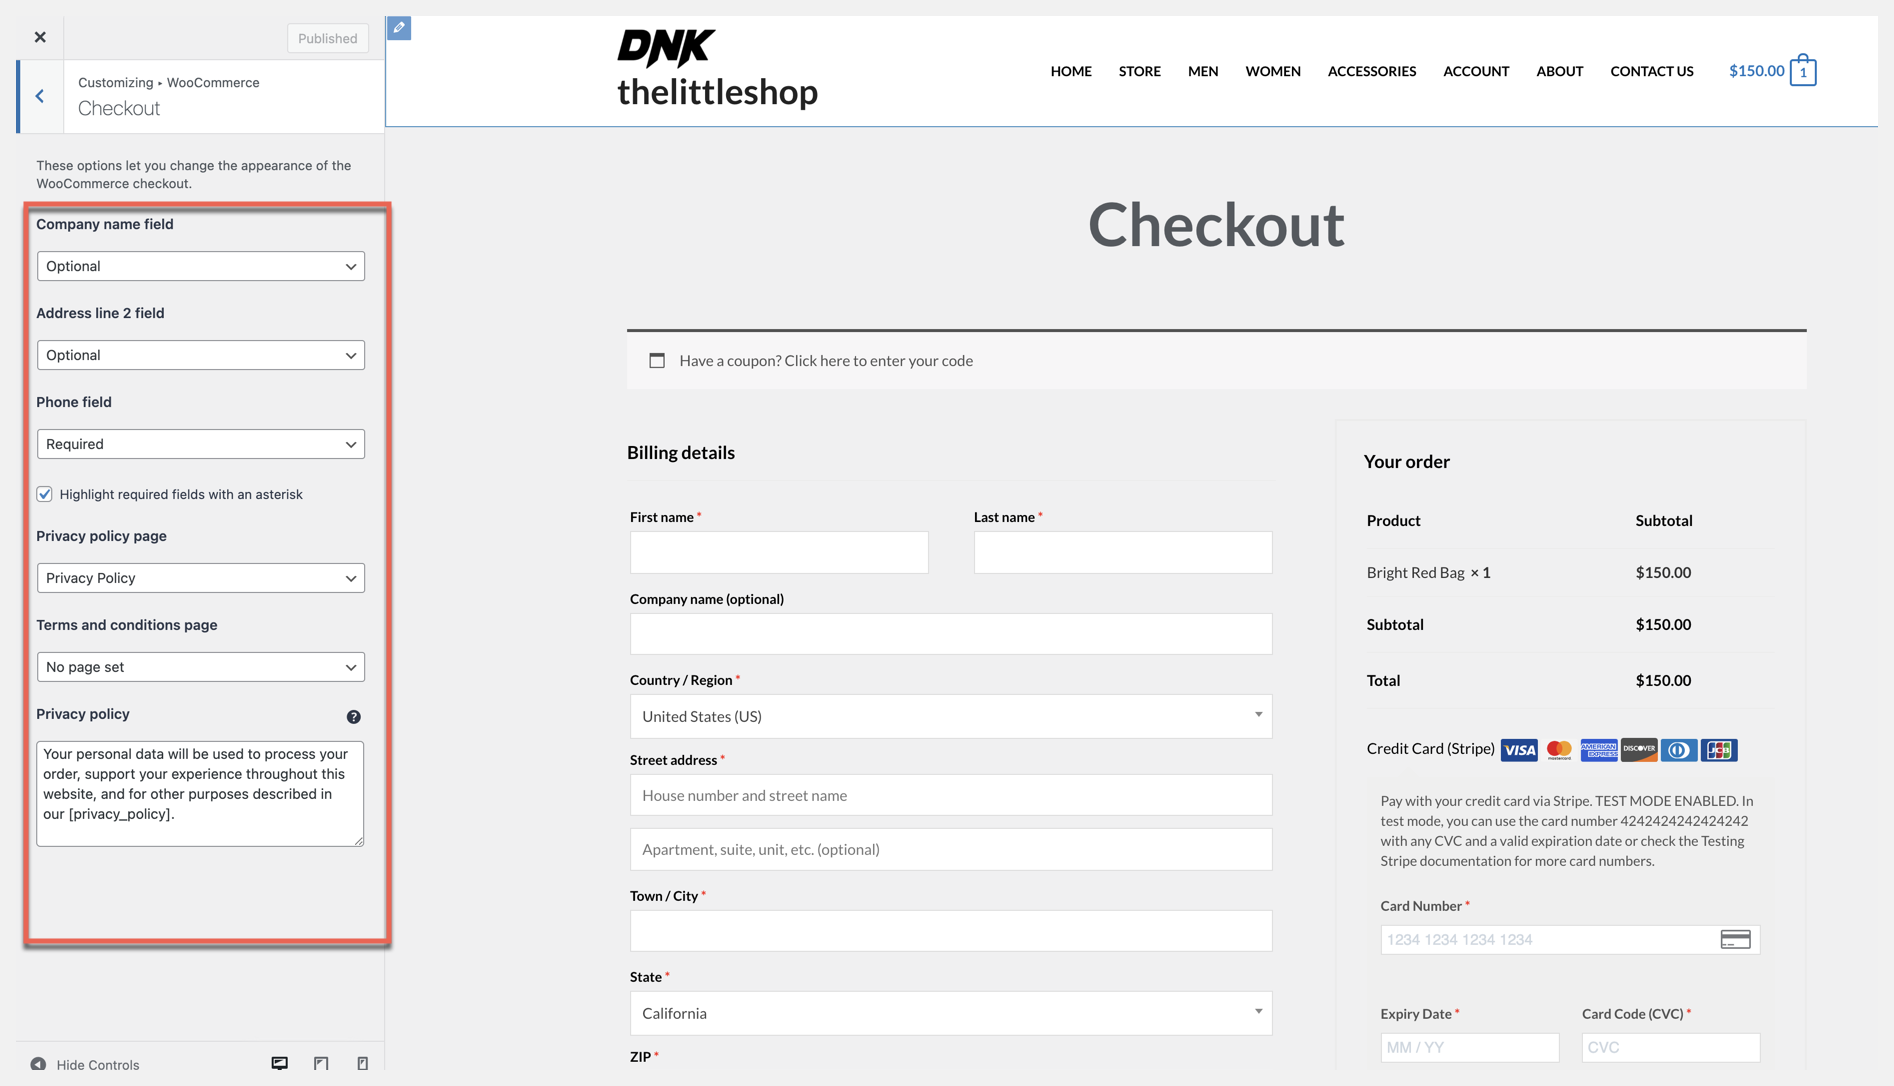
- From the checkout page click Customize at the top of your screen. (Be sure you’re signed into your site)
- Once the menu appears on the left, scroll down to WooCommerce > Checkout
- The WooCommerce Checkout Menu will allow you to make changes to the following fields:
- Company name, Billing Address Line 2, Phone Number, Privacy Policy Page, Terms and Conditions Page. (You can also opt to write a Privacy Policy in the box.)
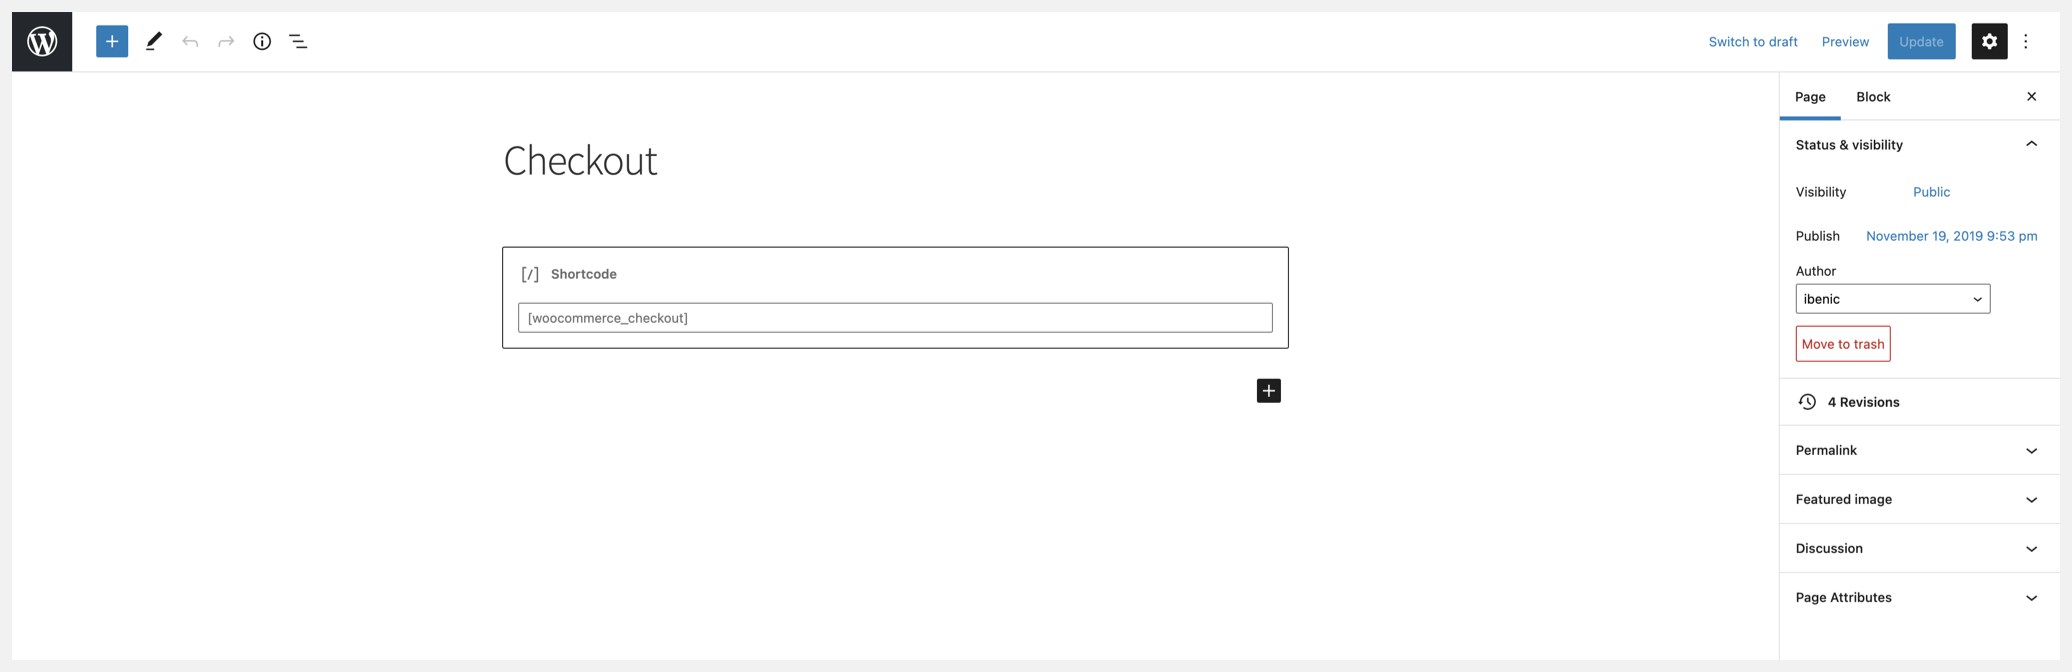
2. From the WordPress Dashboard go to Pages > Checkout > Edit
The checkout page will have a shortcode block with the WooCommerce checkout shortcode. It looks something like this: [woocommerce_shortcode]
Additional shortcode blocks can be added to this page along with any other type of block the WordPress page editor allows. To make customizations it may require some knowledge of code.
If you don’t know how to code don’t panic. You can use the WooCommerce Custom Checkout Fields plugin to edit the default checkout fields without having to know any code.
How To Change the WooCommerce Checkout Fields
The WooCommerce Custom Checkout Fields plugin is a checkout field editor. It uses conditional logic to give you full control of the checkout fields visible to your customers. This means you can tailor the checkout fields based on what’s in your customer’s cart, shipping location, and more.
If you need help installing the WooCommerce Custom Checkout Fields extension we’ve put together step-by-step instructions here.
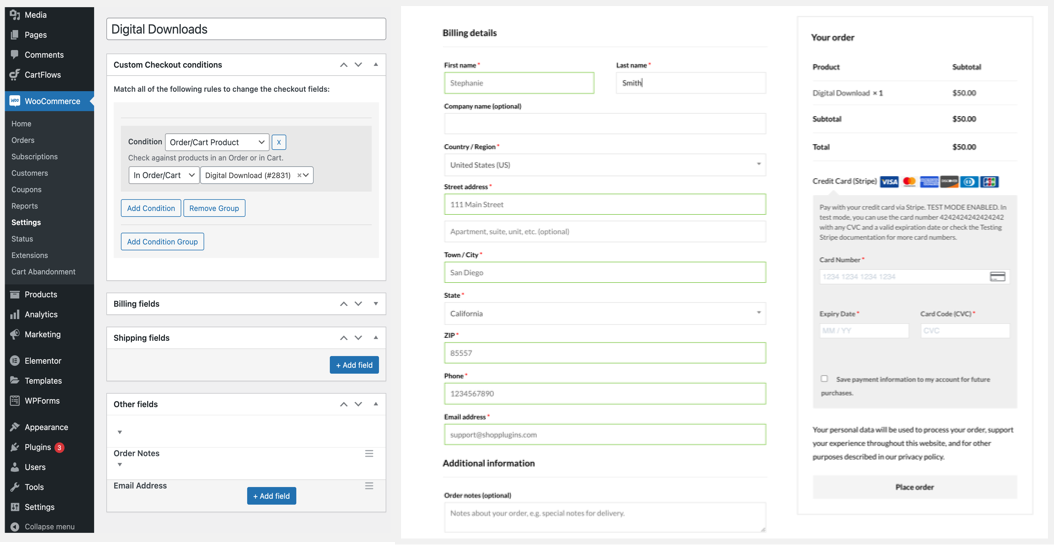
Create Conditional Checkout Fields
A customer who purchases a digital download does not need to provide shipping details at checkout. Create a rule in your store to automatically remove the shipping details when a customer has a digital download in their cart.
If the conditions are true, the unnecessary fields like shipping details will be removed once the customer lands on the check out page.
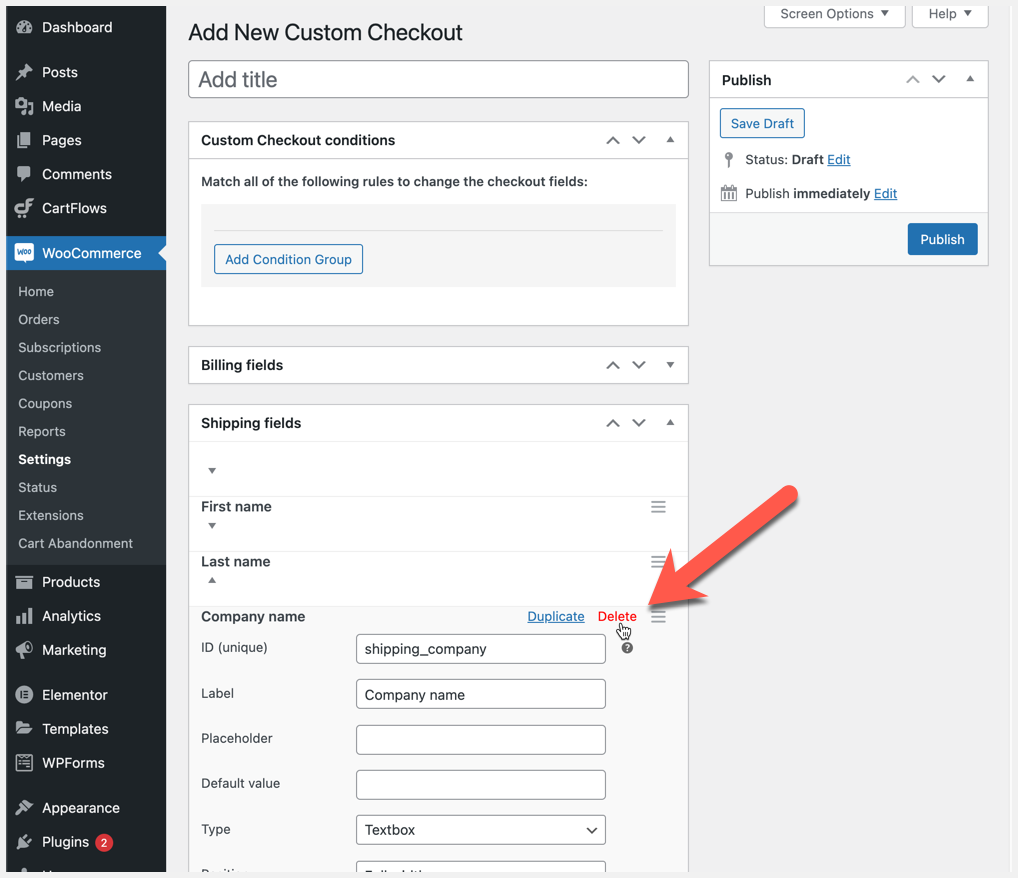
Change A Field
Any of the default checkout fields can be changed. From the Plugins page locate the WooCommerce Custom Checkout Fields plugin and click settings.
Once on the settings page you can manage both the checkout billing and shipping fields.
If you want to remove a field, click on the carrot to open the field and select delete.
Add A Custom Checkout Field
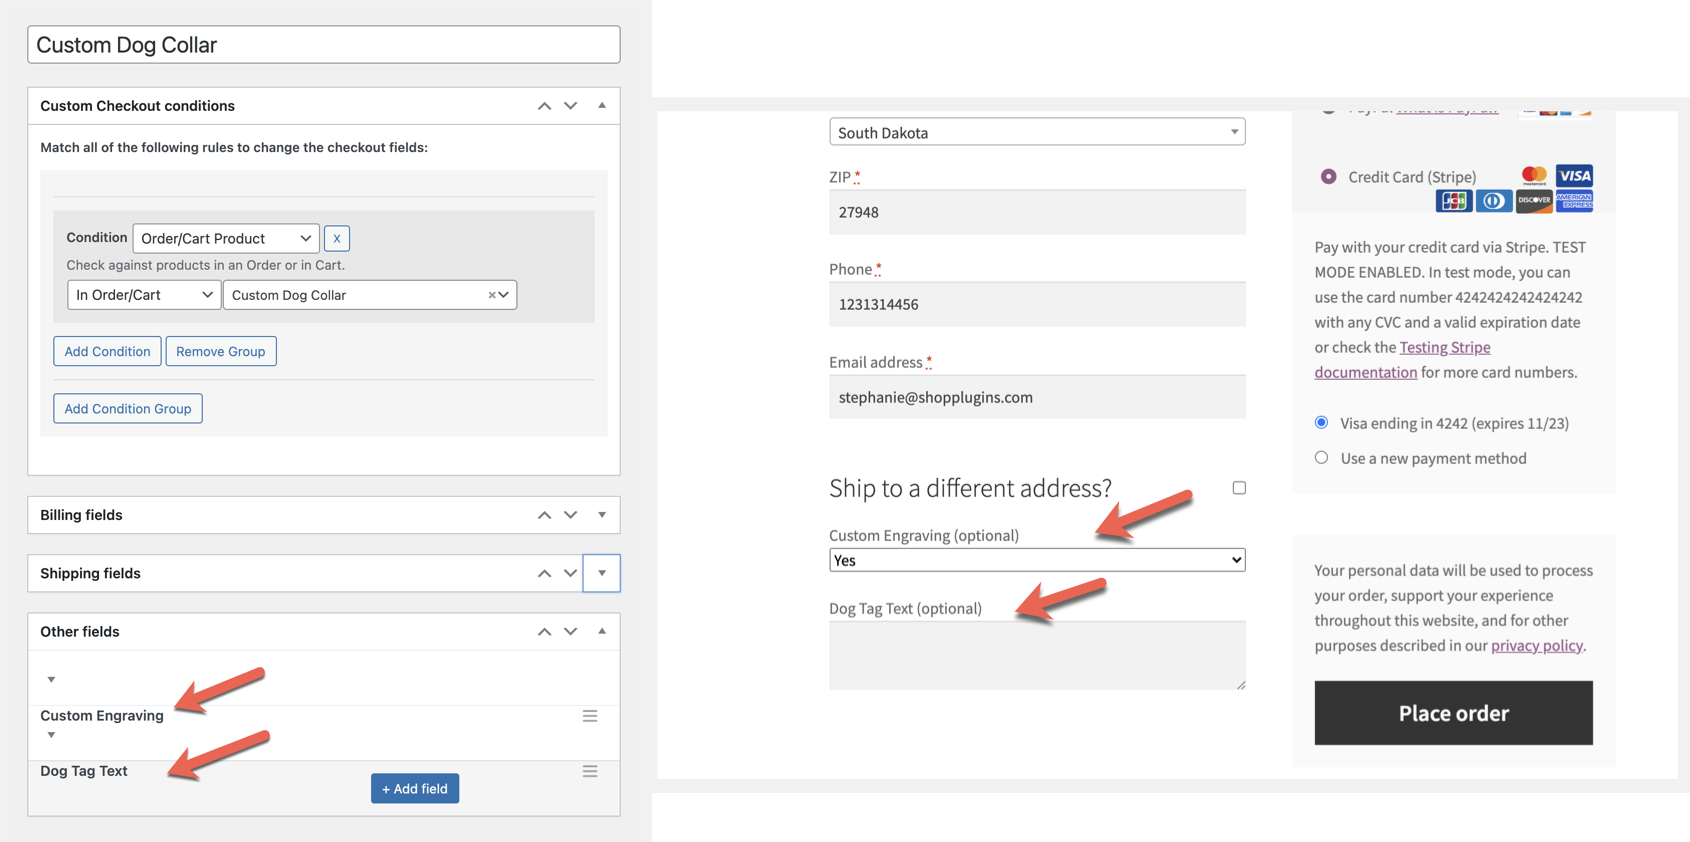
Custom checkout fields can be added for all visitors or add a rule for specific users only. For online shops that sell customized products, you can create additional fields for the customizations.
In this example, a shop sells personalized dog collars. For any visitor that adds a dog collar to their cart, they will be asked if they want engraving along with the message to engrave.
Checkout page: The page that seals the deal. This is where the customer enters their information, payment details and clicks the button to officially complete a transaction with your e-commerce store.
In conclusion, when customizing the WooCommerce checkout fields there is some strategy you can implement. Analyze what goals your e-commerce shop wants to meet and how these can be worked into your checkout page. Collect valuable information at checkout to optimize the user experience.
For instance, a store selling subscriptions might use this as an opportunity to collect anniversary dates. Once you know the customer’s information, you can now personalize the subscriber’s subscription box for the month of their anniversary.
Small details like these will add a personalized touch to your store and keep your customers coming back for the long run.