Installation
For questions on how to install a plugin, check out our Installation Guide.
Getting Started
Creating an Advanced Message
Creating a new message is simple, just follow the steps below:
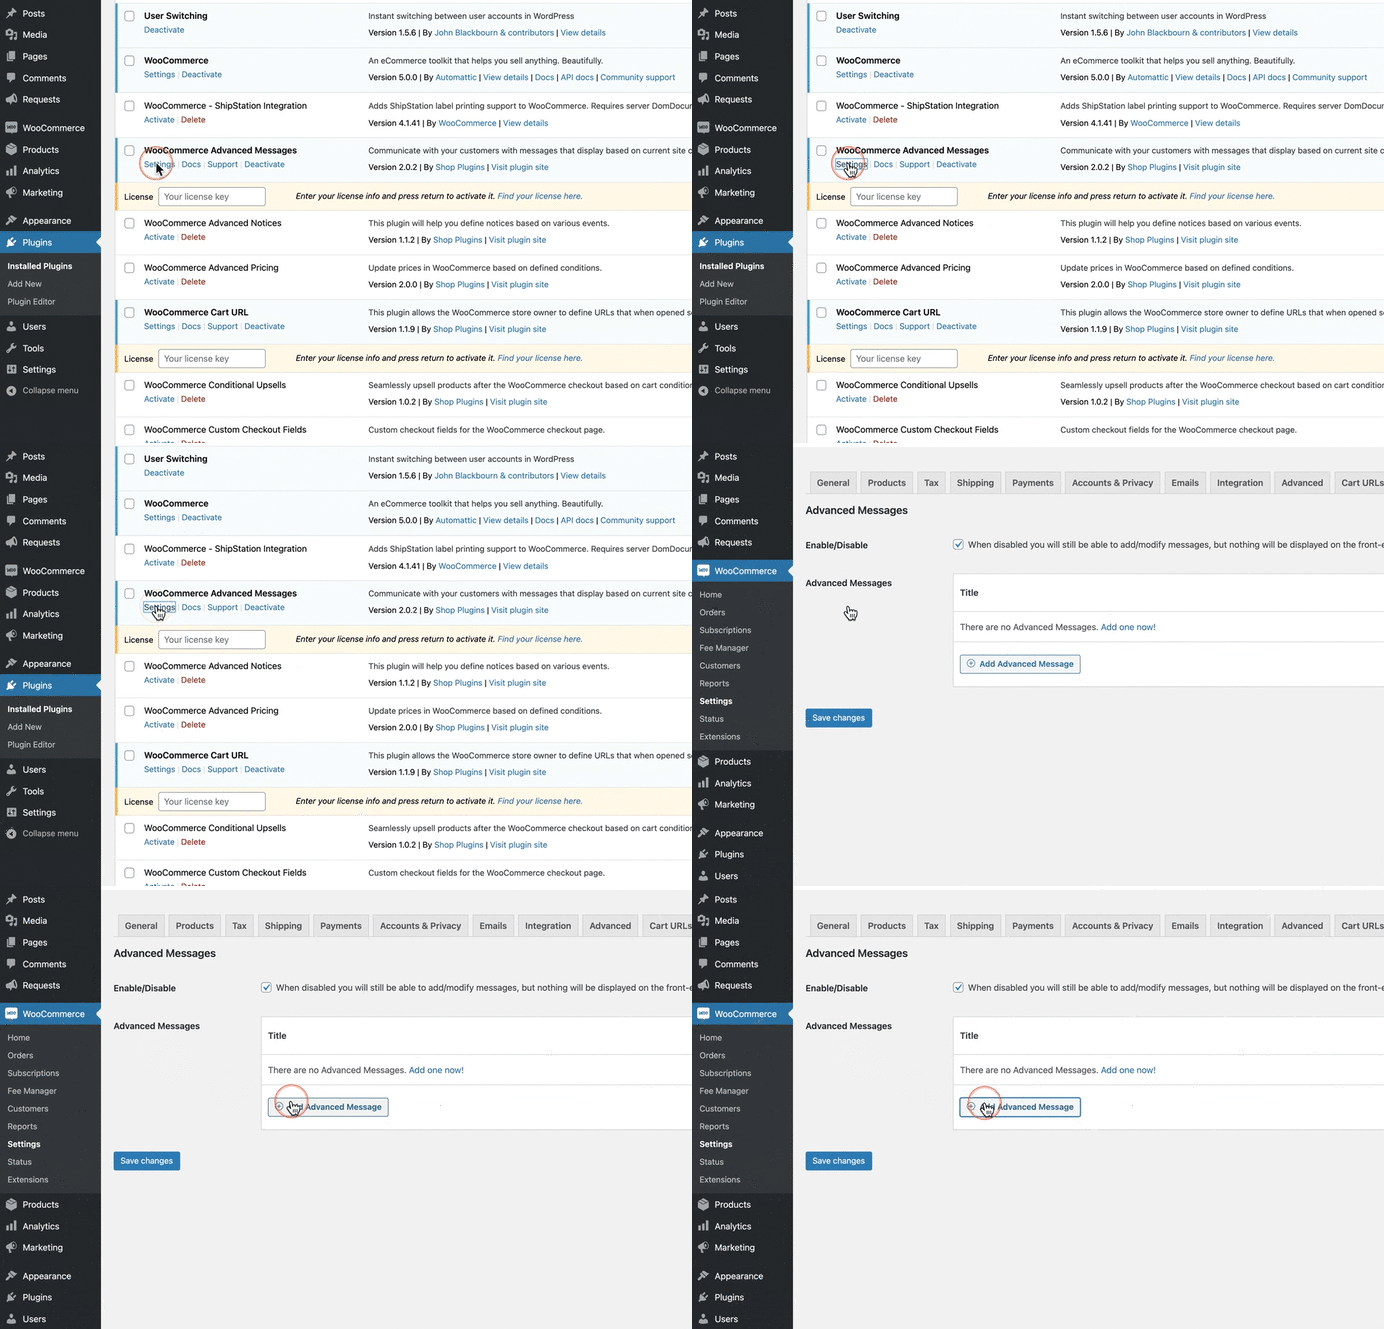
- From the plugins page click on the Settings link under WooCommerce Advanced Messages.
- Make sure the box is ticked to enable messages
- Select Add Advanced Message to create a new message
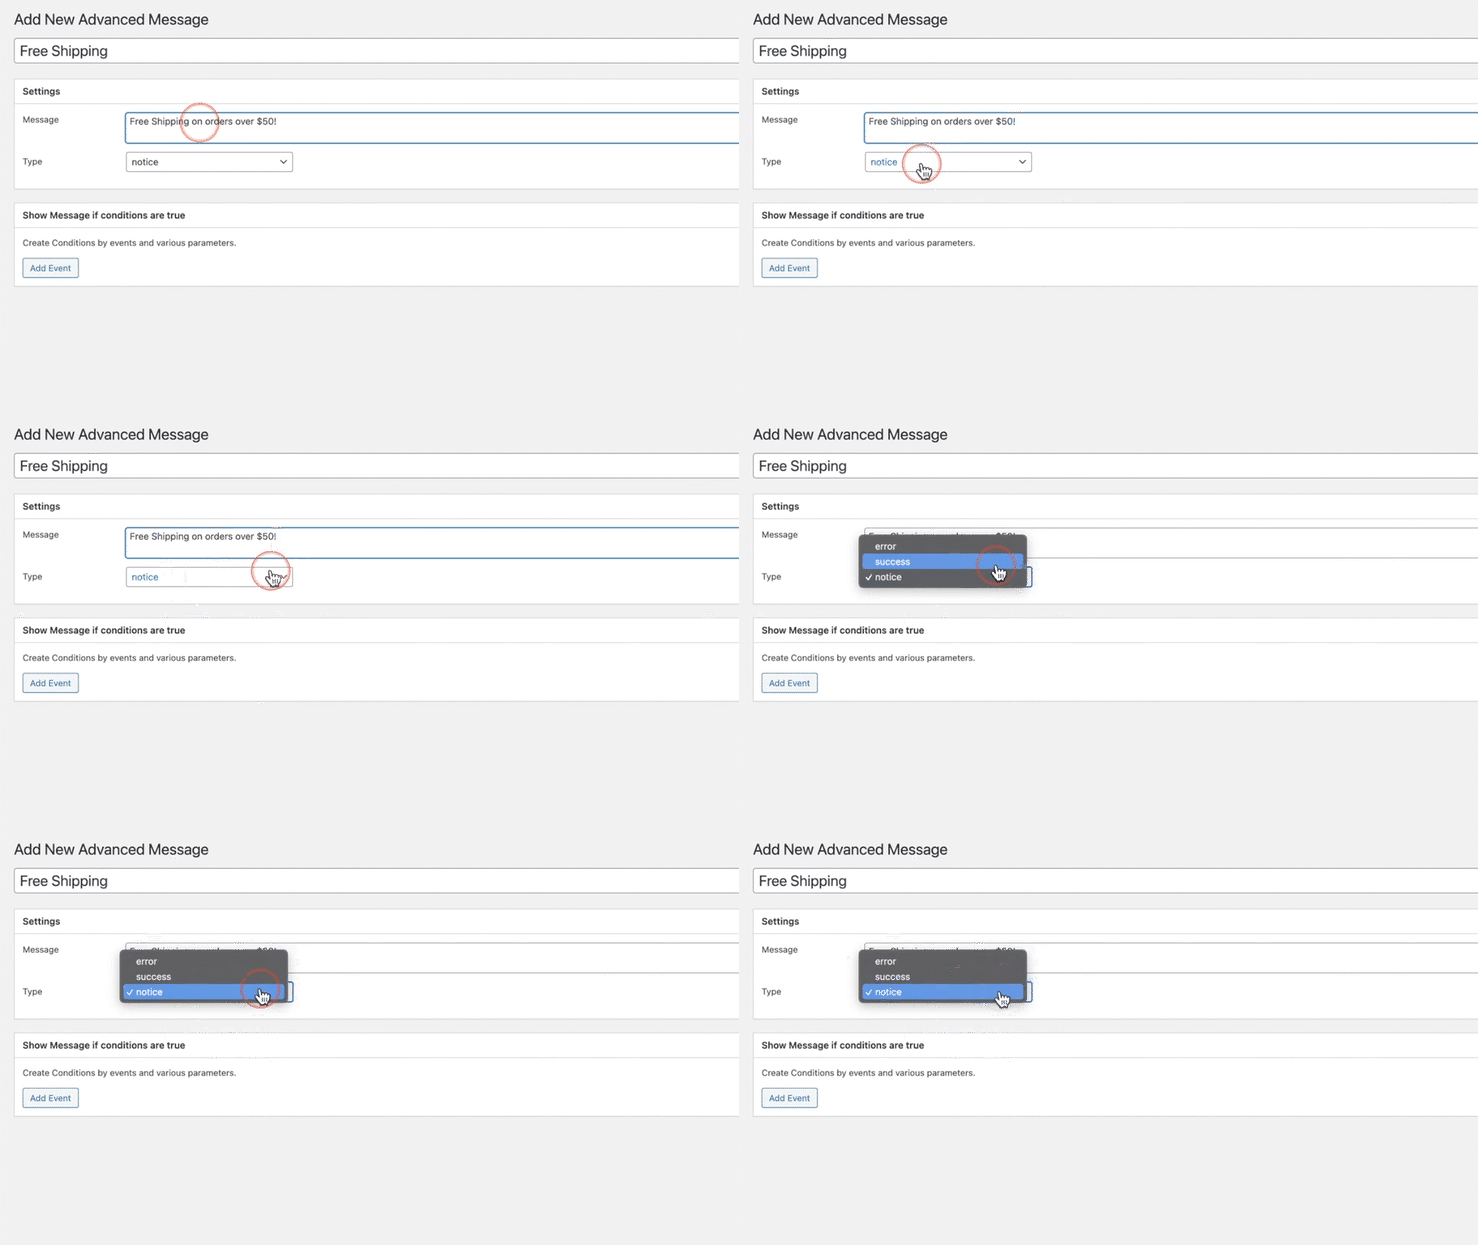
- Add the Title. The name of the title will not be visible to the customer.
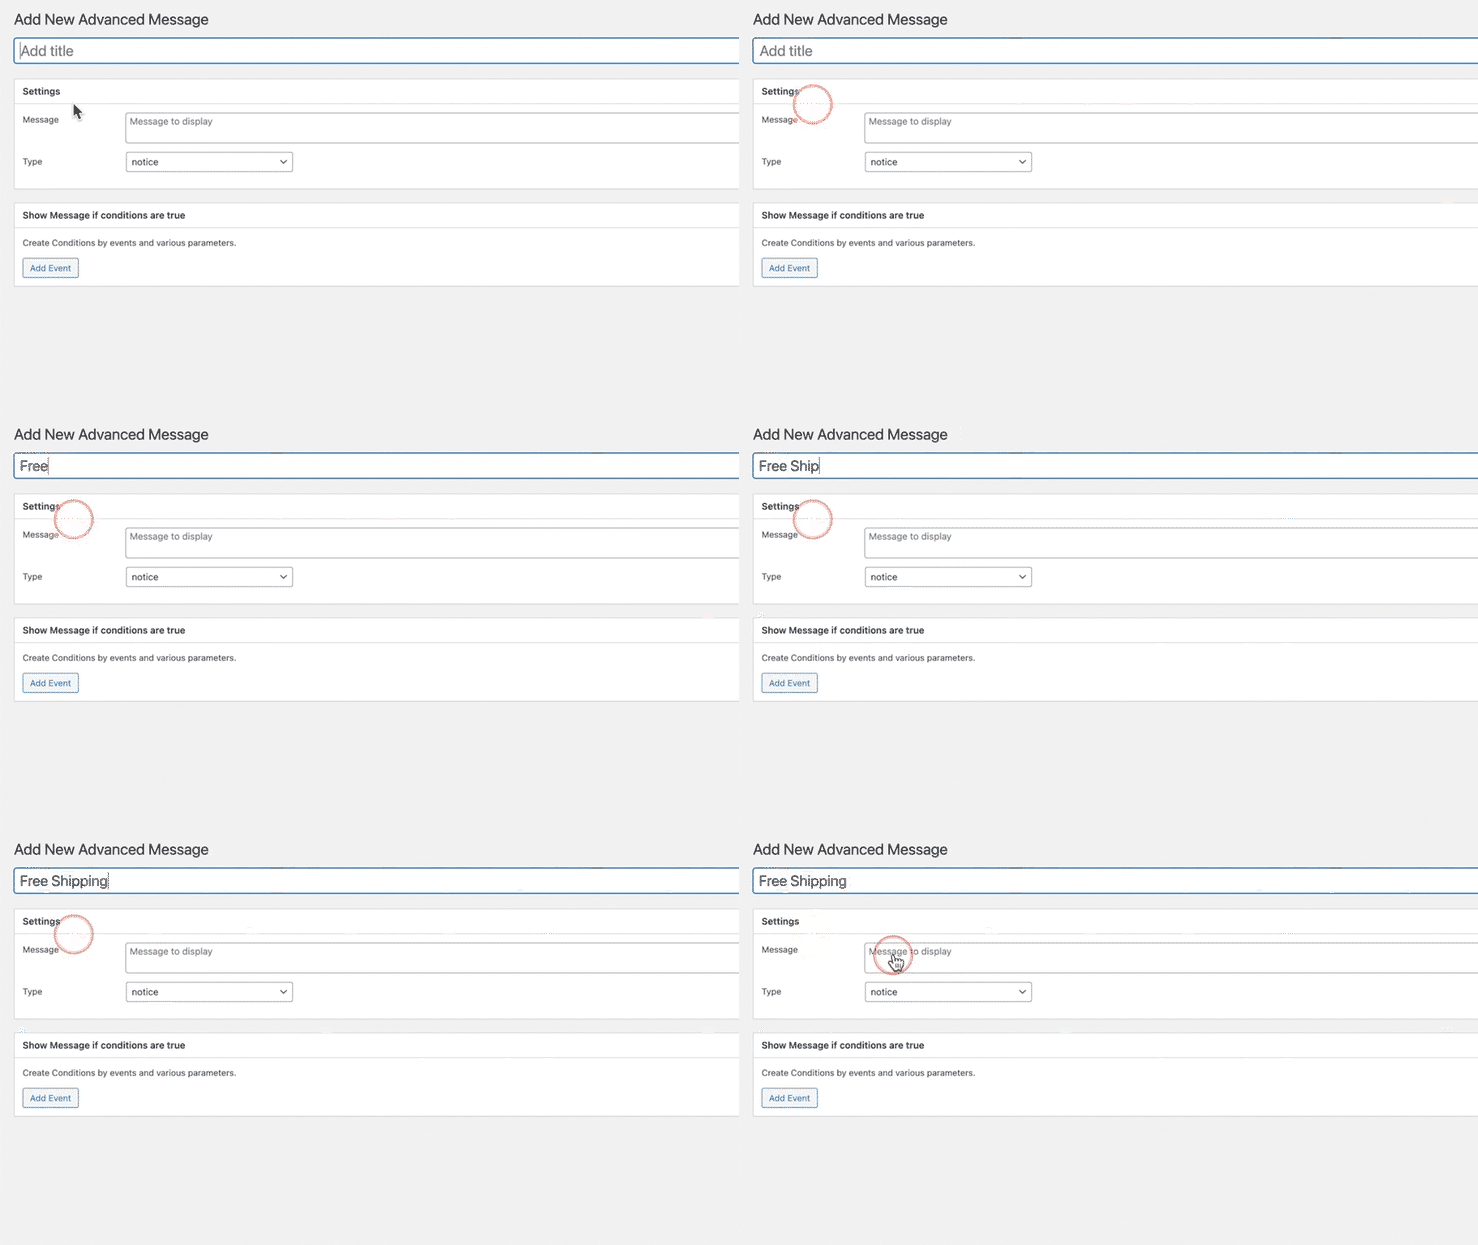
- Enter the message you want to display to the customer. Next select the message type (either “error”, “success”, or “notice”)
Adding Conditions
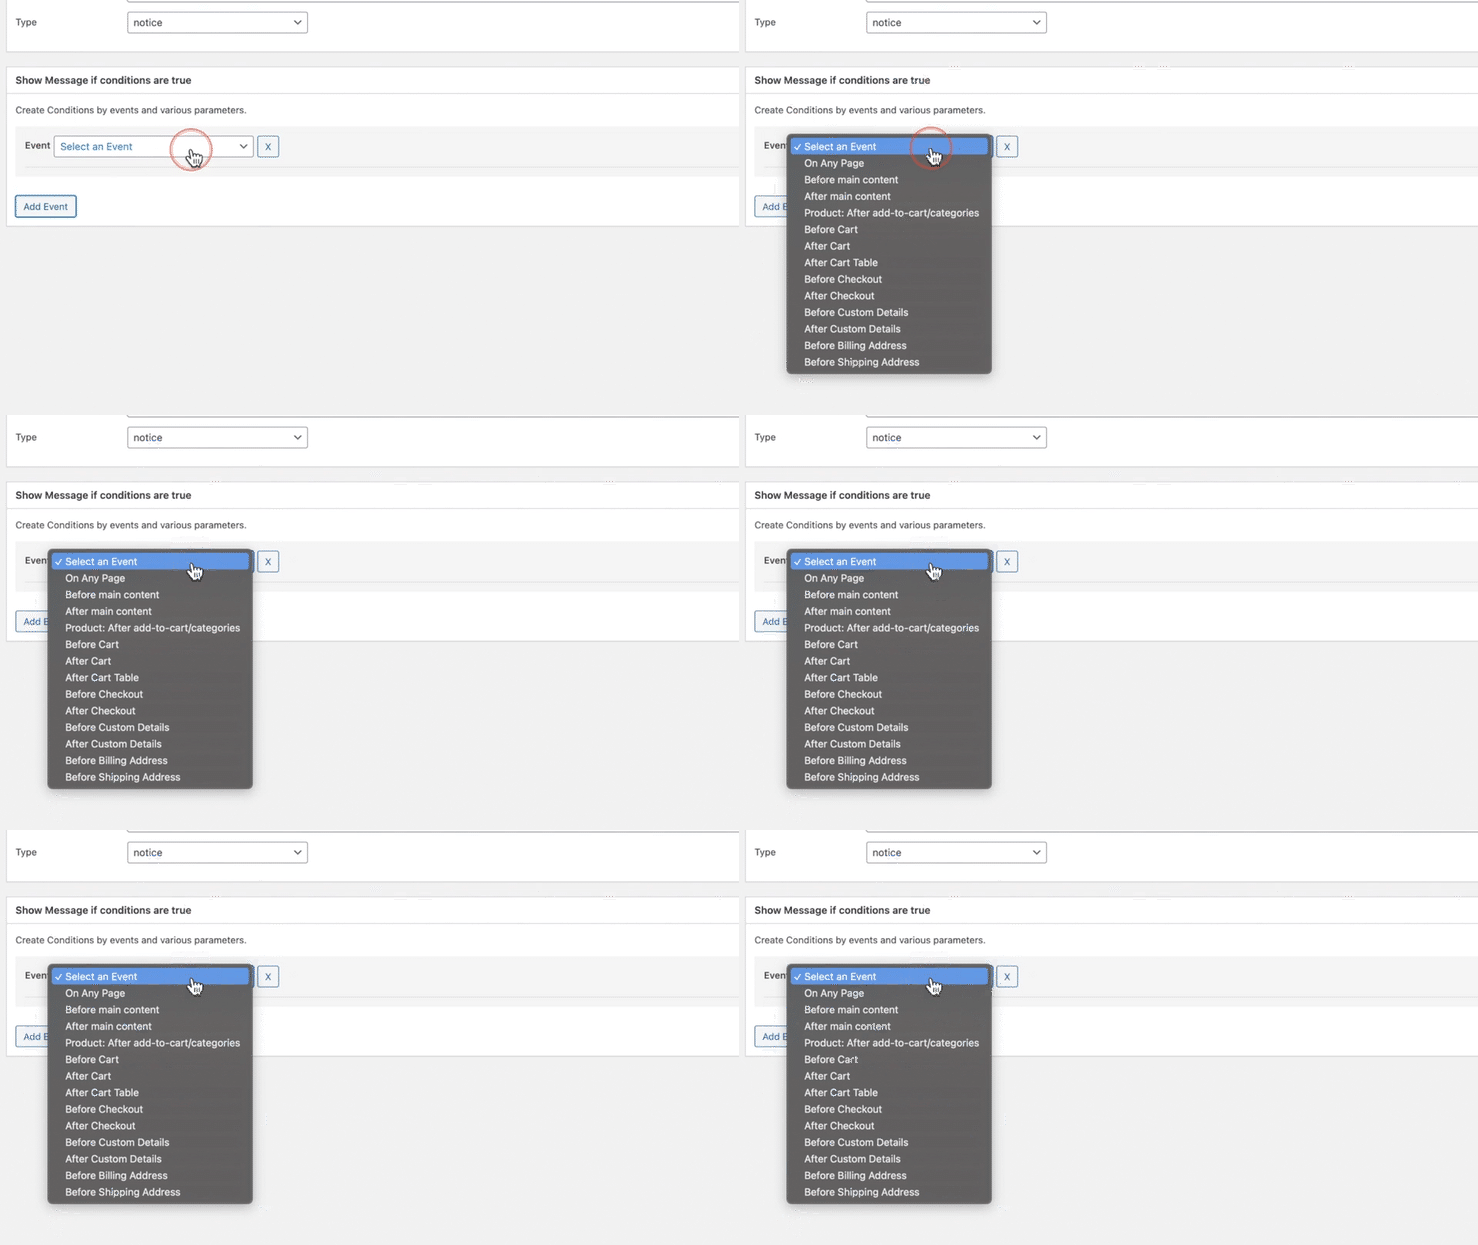
- A variety of options are available to create multiple condition combinations. First, determine the event or where you want your message to be displayed. This can be set to display on every page or a single page.
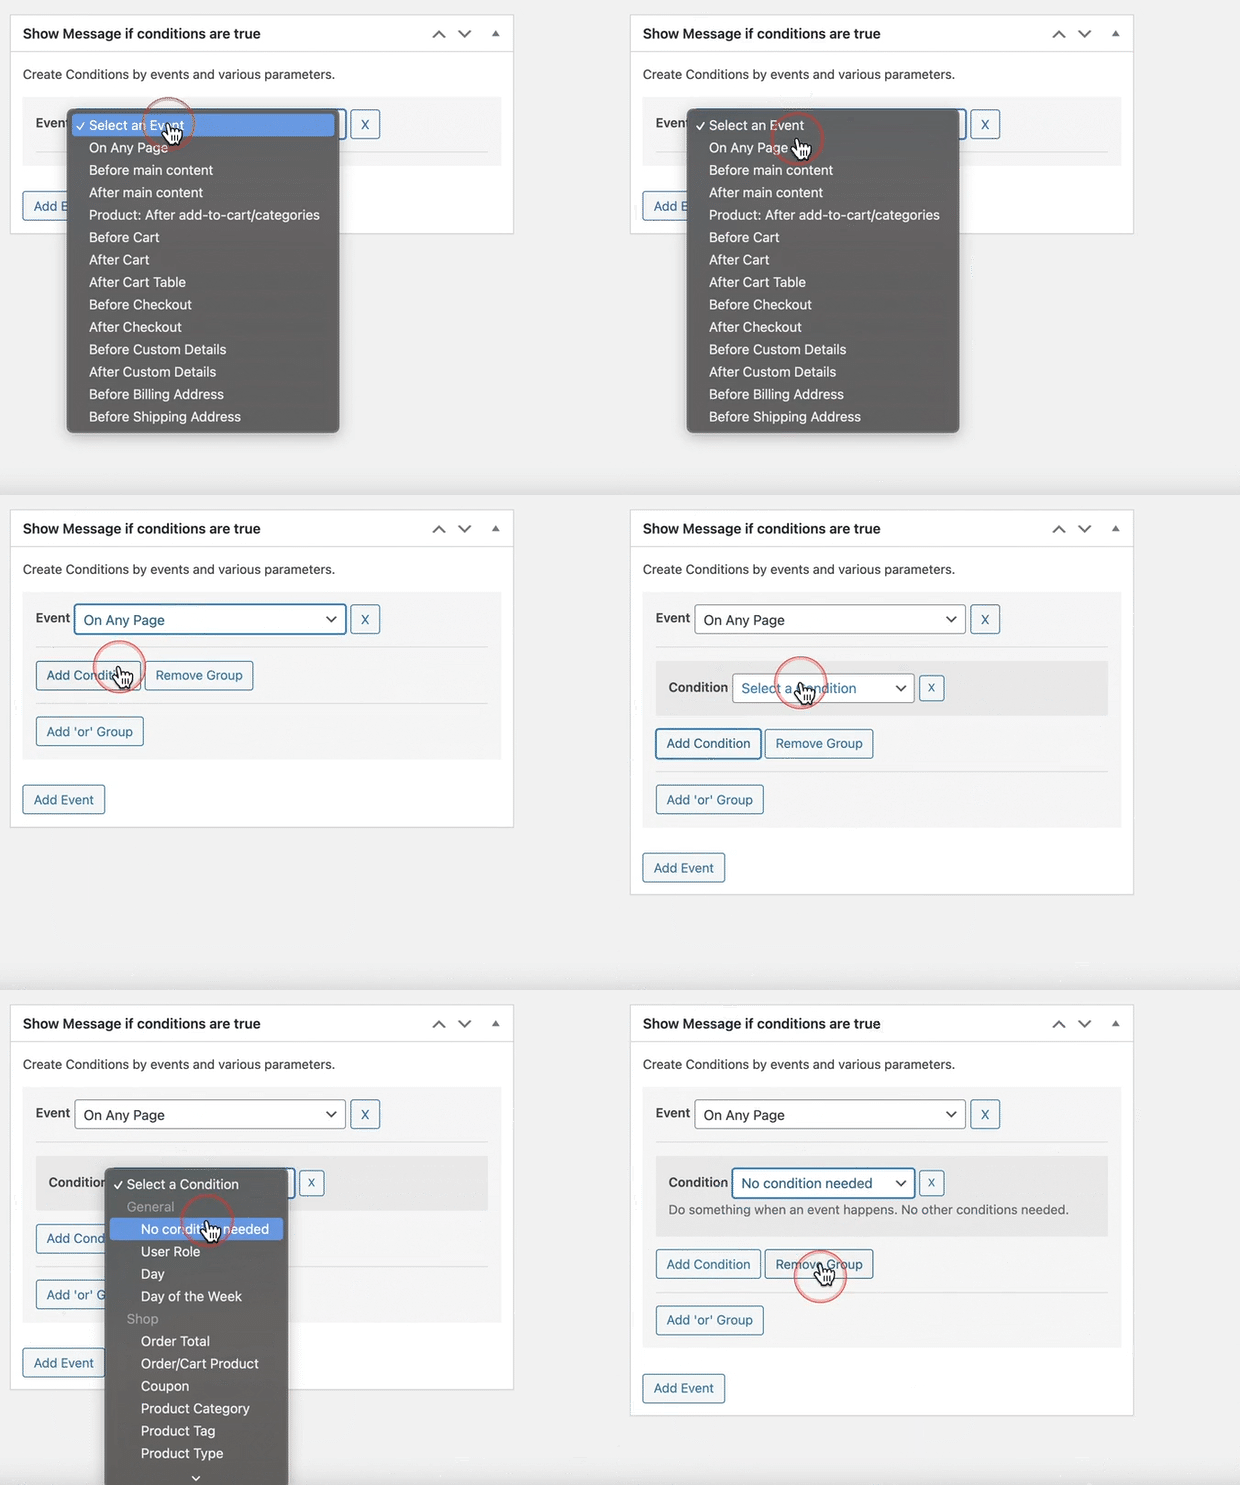
- After you’ve determined where your message will appear, select the desired conditions. The conditions must be met for your message to appear on the storefront.
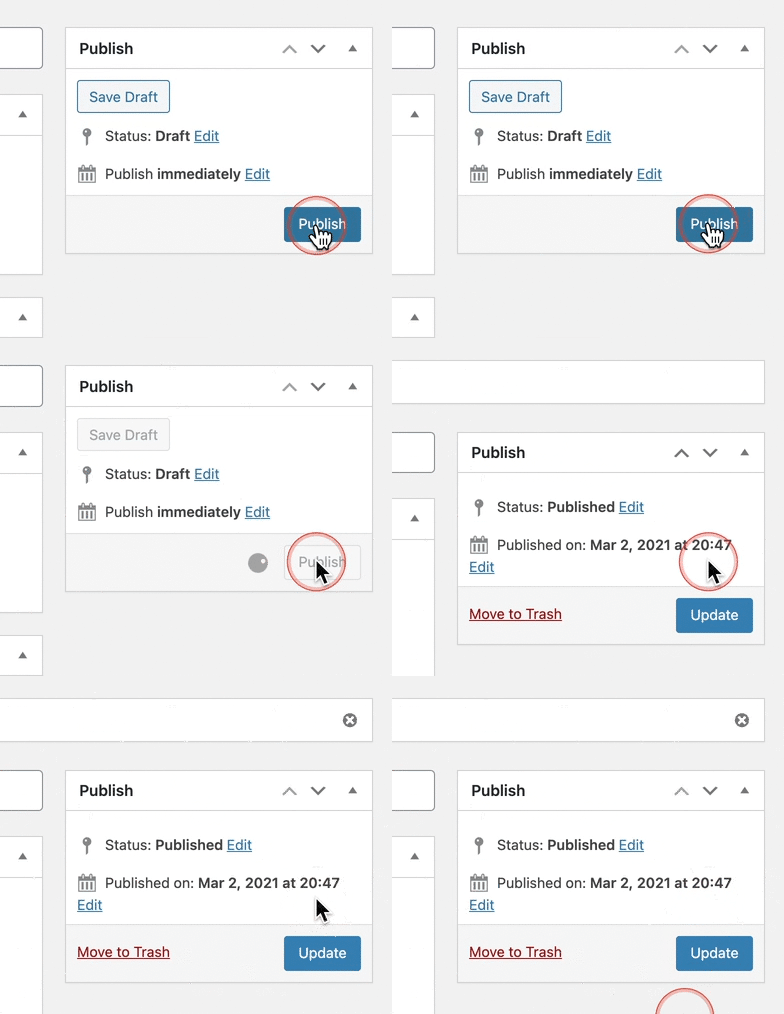
- After you’ve created the message don’t forget to Press Publish to save the settings of your new Advanced Message.
What the Customer Will See
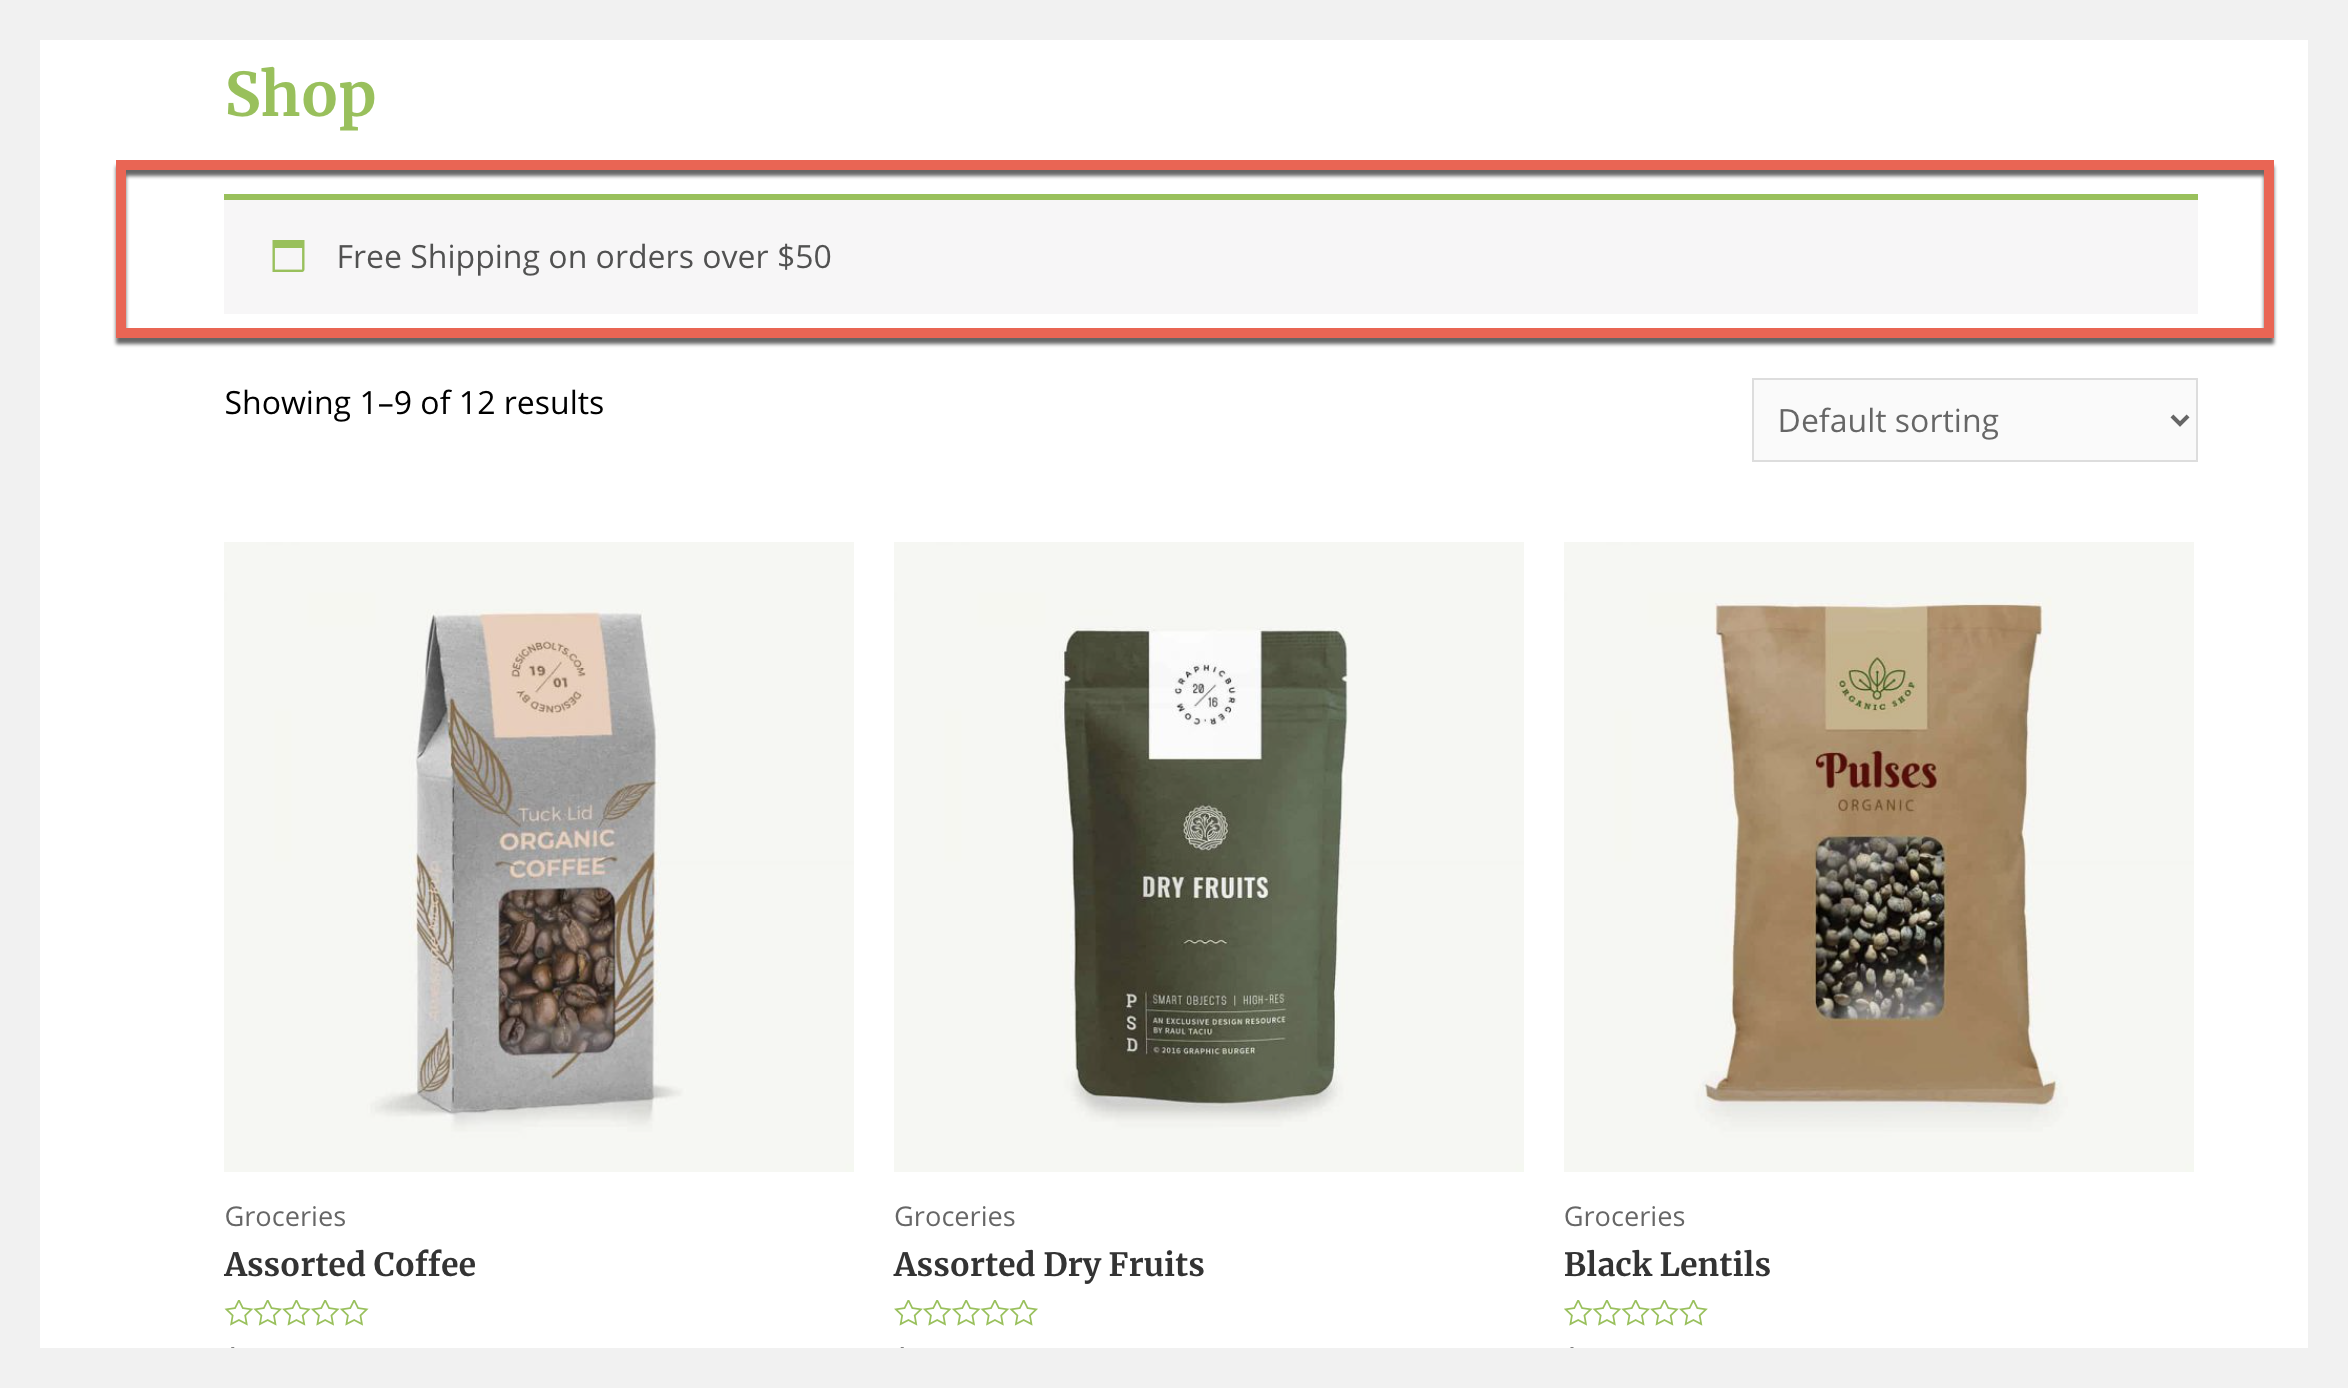
- Once a message is created it will be displayed in the same theme as your website. The message will appear to your customer based on the conditions you’ve created. It’s always a good idea to test your message to see how it will appear on the storefront.
Deleting A Message
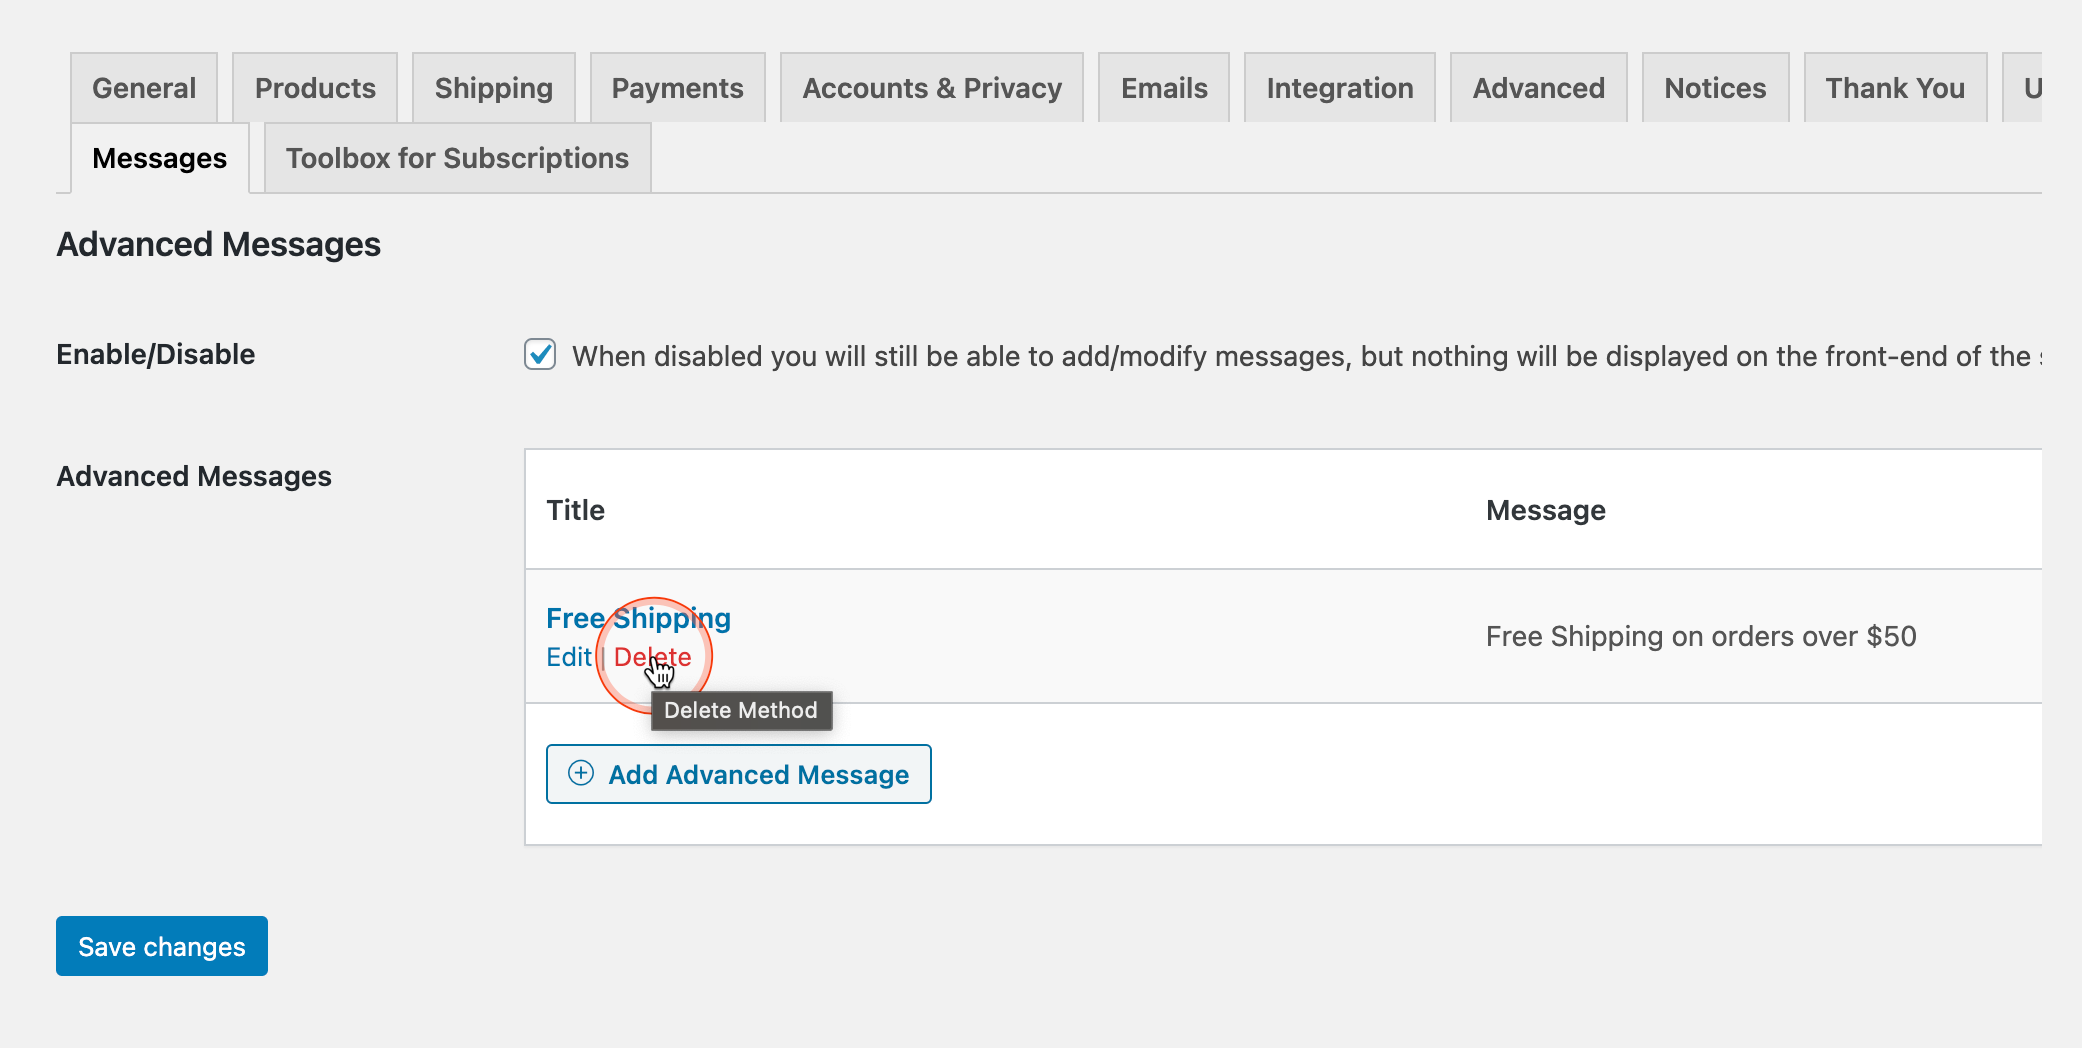
- To delete an Advanced Message go to WooCommerce > Settings > Messages. Find the message you would like to delete and hover over it. From here select delete and the message will be permanently removed once the changes are saved. It’s good to remember deleted messages can not be recovered from the trash.
Frequently Asked Questions
- Can I create out-of-stock messages?
It is possible to set up custom messages per product. They will need to be set up from the global rules, and configured for which products you’d like to show them on. (the ‘Page’ condition also allows for products to be selected).
This does mean you’d have to set up a separate message and configure it per product, which may not be as intuitive as setting a message in the edit-product screen.
‘Manage stock’ is not something that is a default condition, but the plugin has been made to be easily extendable, allowing you to create a code snippet that adds such conditions relatively easily.
- Help! My message won’t save.
Deactivate the plugin and reactive it. If that does not resolve the issue please send an email with a copy of your WooCommerce System Status report to support.

