This documentation is for the WooCommerce Store Locator plugin.
For questions on how to install a plugin on your site check out our Installation Guide.
Getting Started With Store Locator
Once the plugin is installed and activated a Store Locator page will be added to your WordPress site using the [woocommerce_store_locator] shortcode. You can find this under Pages > Store Locator.
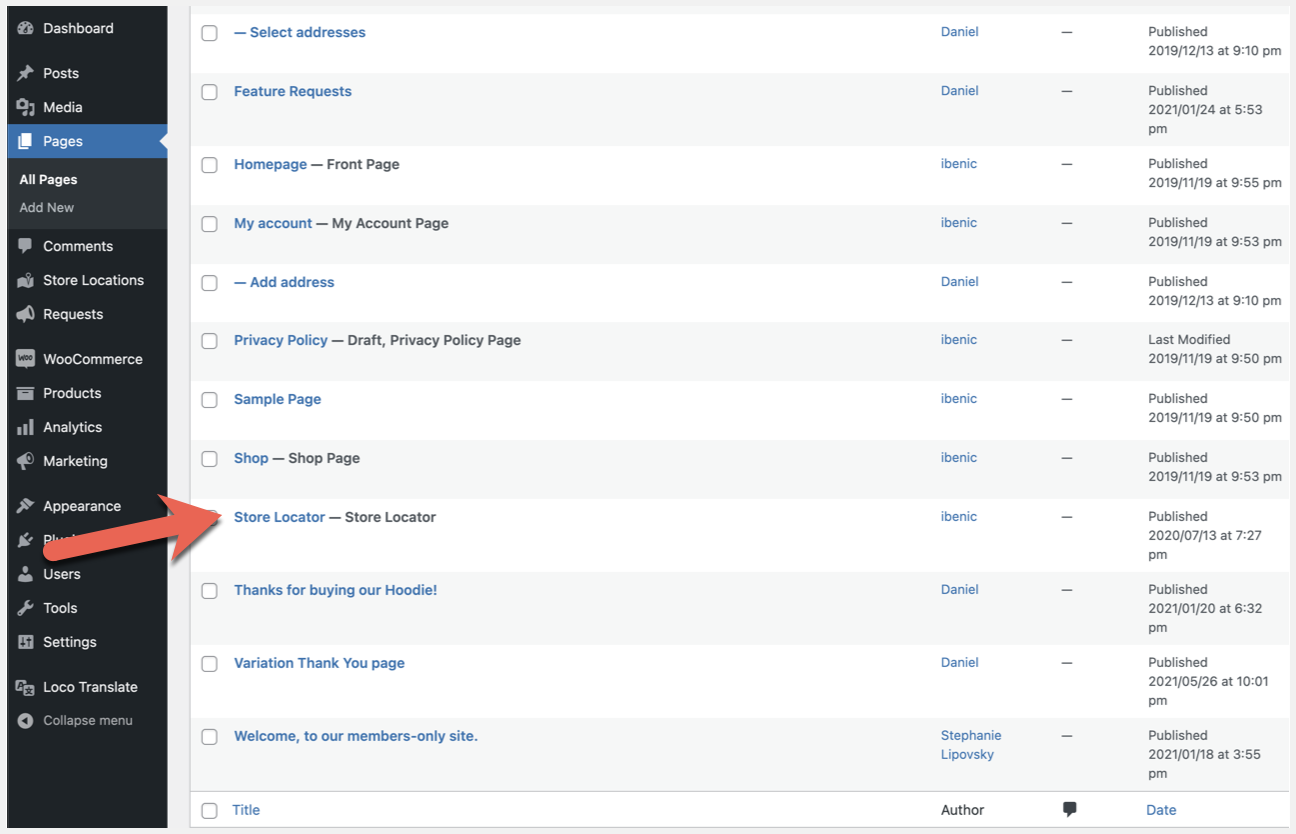
Store Locations
From here you can manage all of your store locations.
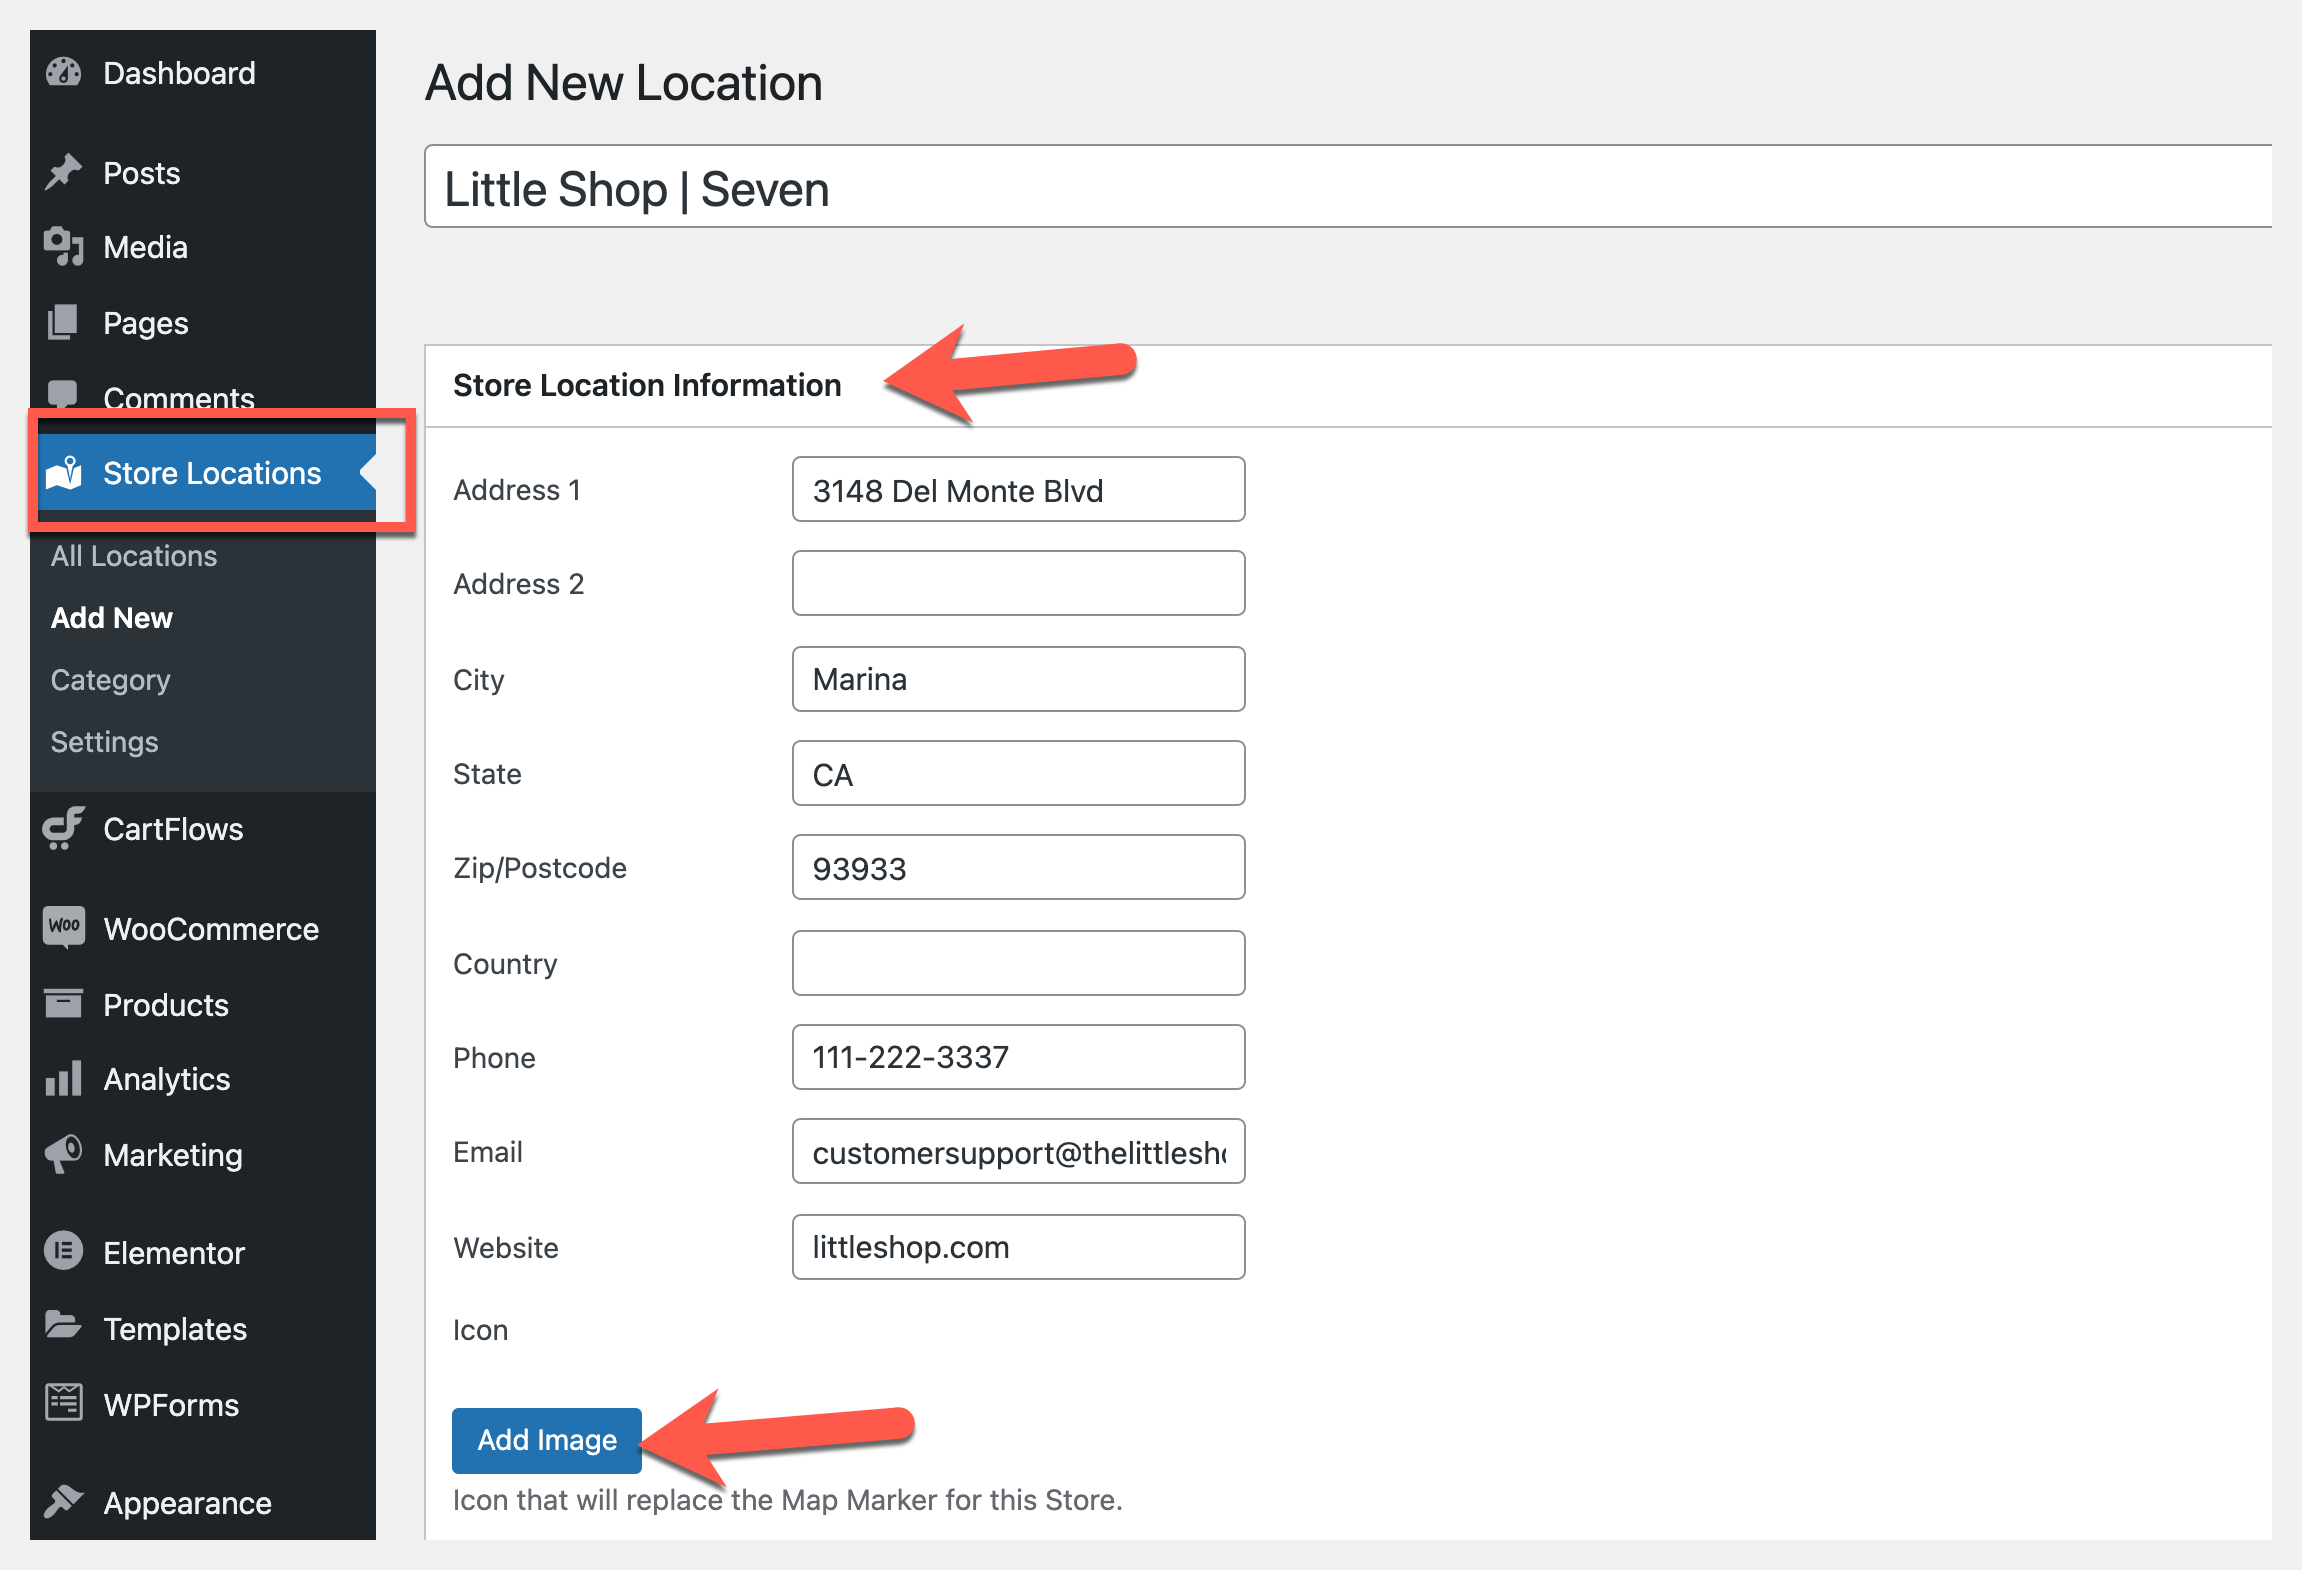
Add New
-
- Select the add new button to create a new store location.
- From here enter the title, store location information, select an image to be shown as the map icon.
Google Maps Information
For the store location to appear on the map enter the location address into the address box and select Get Latitude/Longitude. This will place a map marker on the correct location based on the latitude and longitude coordinates.
*Zoom Level can also be set at this time by selecting a level from the drop-down box. 1 is far away, while 15 is very close.

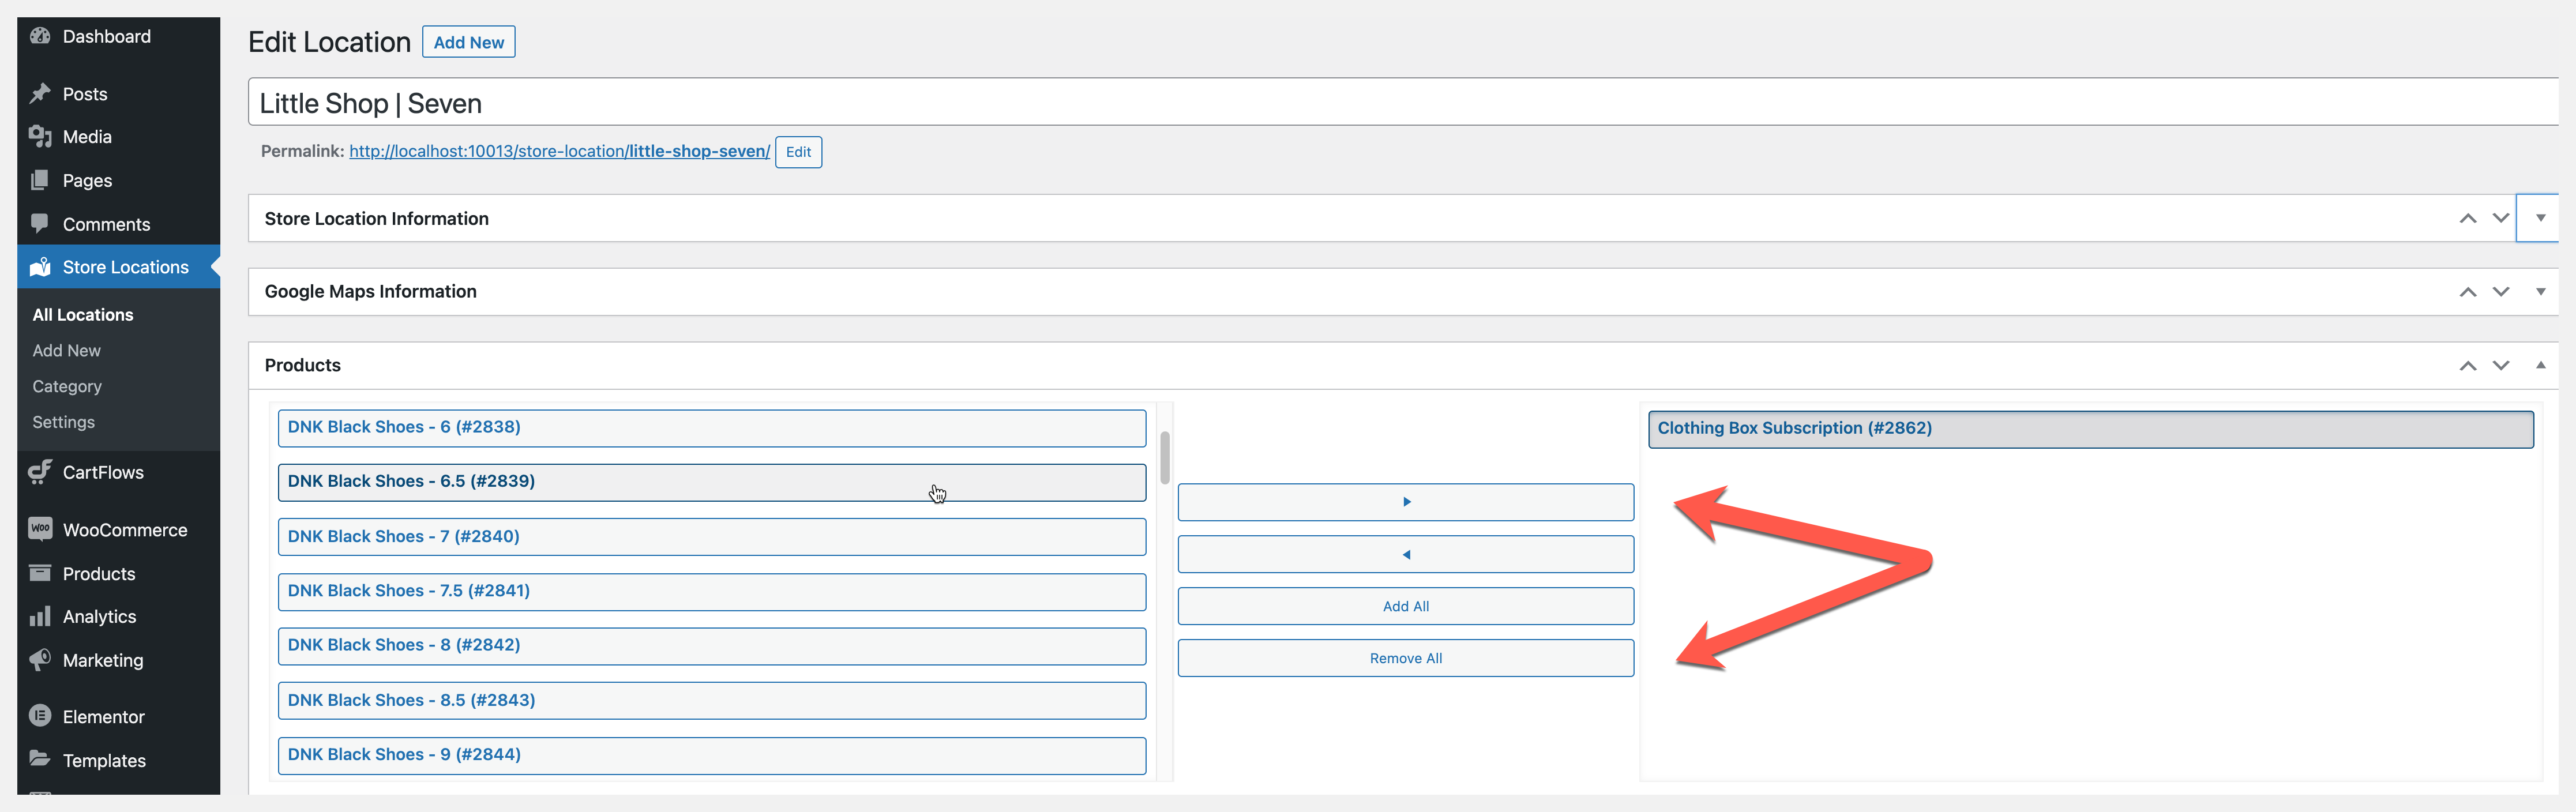
Products
Add individual products to the location by selecting the product and then the forward arrow. To add every product available select the Add All button.
To remove a single product, click the product and select the back arrow. To remove all products select the Remove All button.
Publish
After entering all information for the store location click the Publish button. This store will be added to the online directory and will be visible on your store locator page.
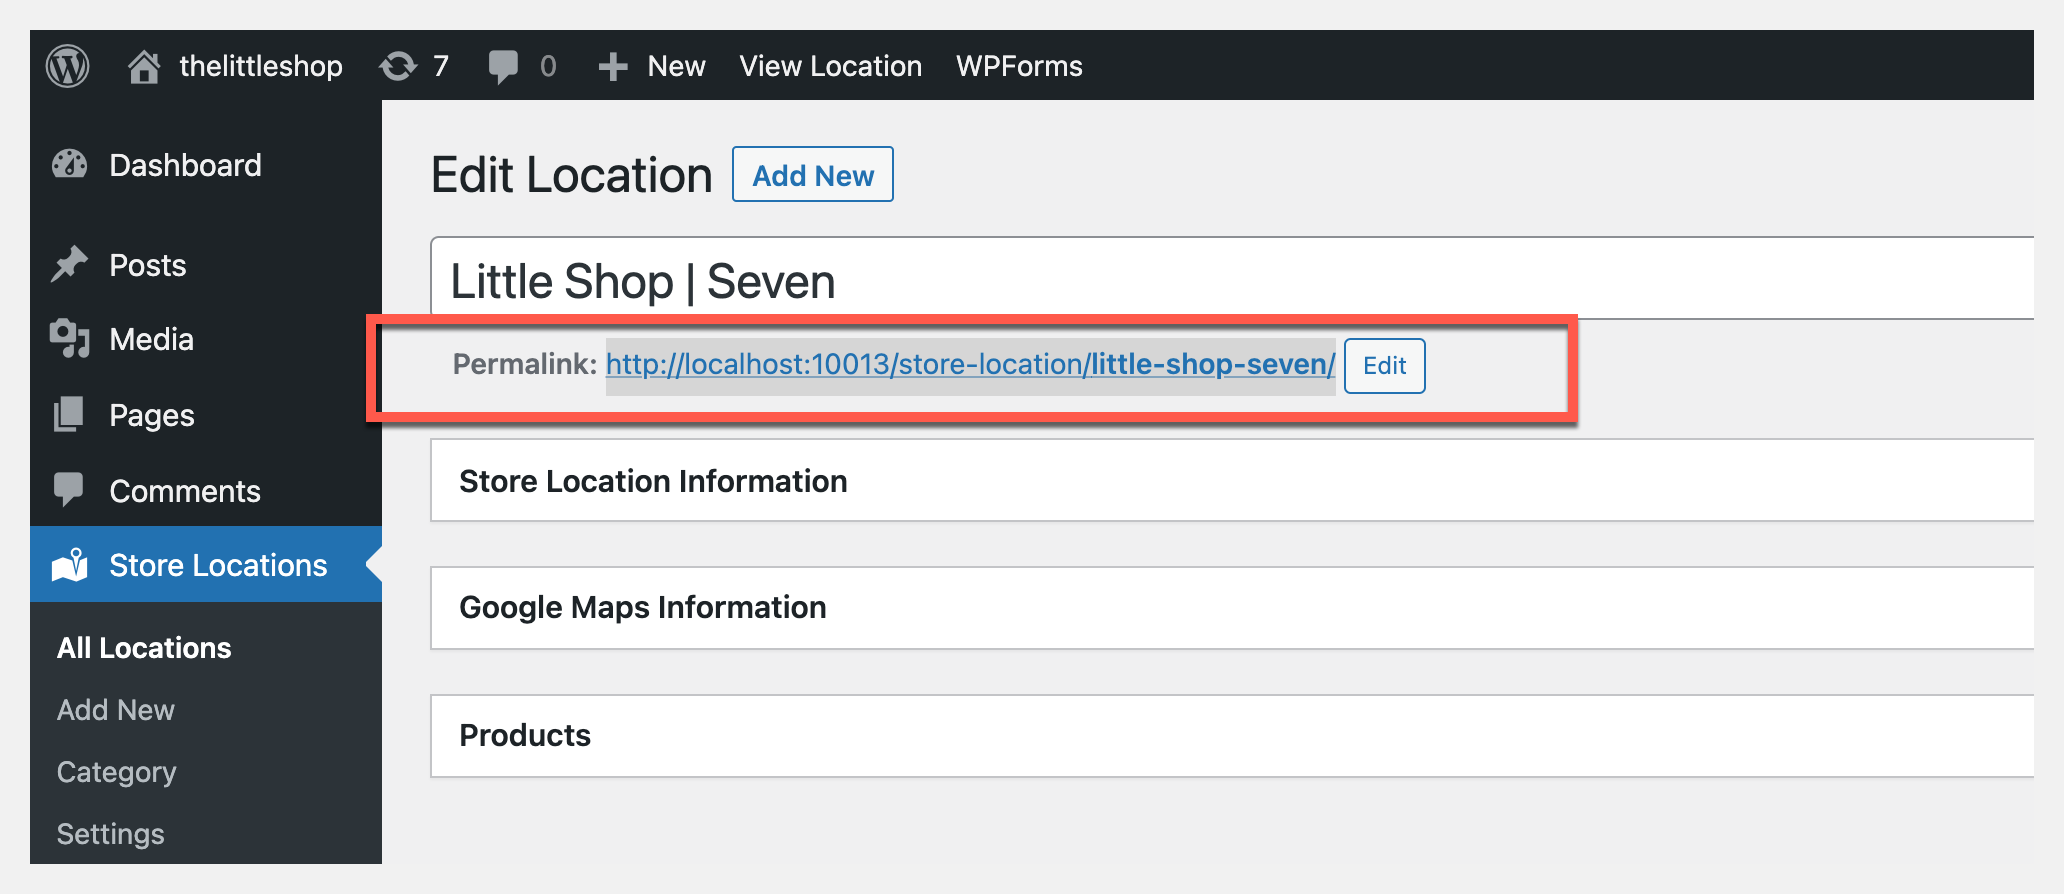
Permalink
After adding the details for the store location and clicking publish a permalink for the individual location will appear below the Store Title. This permalink can be edited by clicking the edit button. If you select the permalink it will take you to the page for the individual store location. Share this link with customers to provide them with the store’s information.
All Locations
The All Locations tab will display a list of all store locations in the directory.
- View published and trashed locations
- Bulk edit stores
- Search for a location using the search box
- Add New Locations

Add New
Quickly add a new store to your directory by selecting New Location under Store Location from the WordPress dashboard.
Category
Assign categories to store locations. This option is helpful in showing visitors what’s available at a specific location. For example, coffee shops might add a category called drive-through or indoor dining to show which locations offer the different features.
Categories can be used to identify distributors or vendors of your product. You can even show which locations are open 24 hours.
To set categories:
- Add a name to the category in the Name box. Example: Accessories
- Enter the slug, the URL-friendly version of the name.
- Parent Item – hierarchy structure can be built by assigning a parent item
- Description – this is a description of the category and it may appear to your customers depending on the theme of your site
- Edit – bulk edit, or hover over an individual category to change the name and description
- Count- displays the number of stores assigned to this category

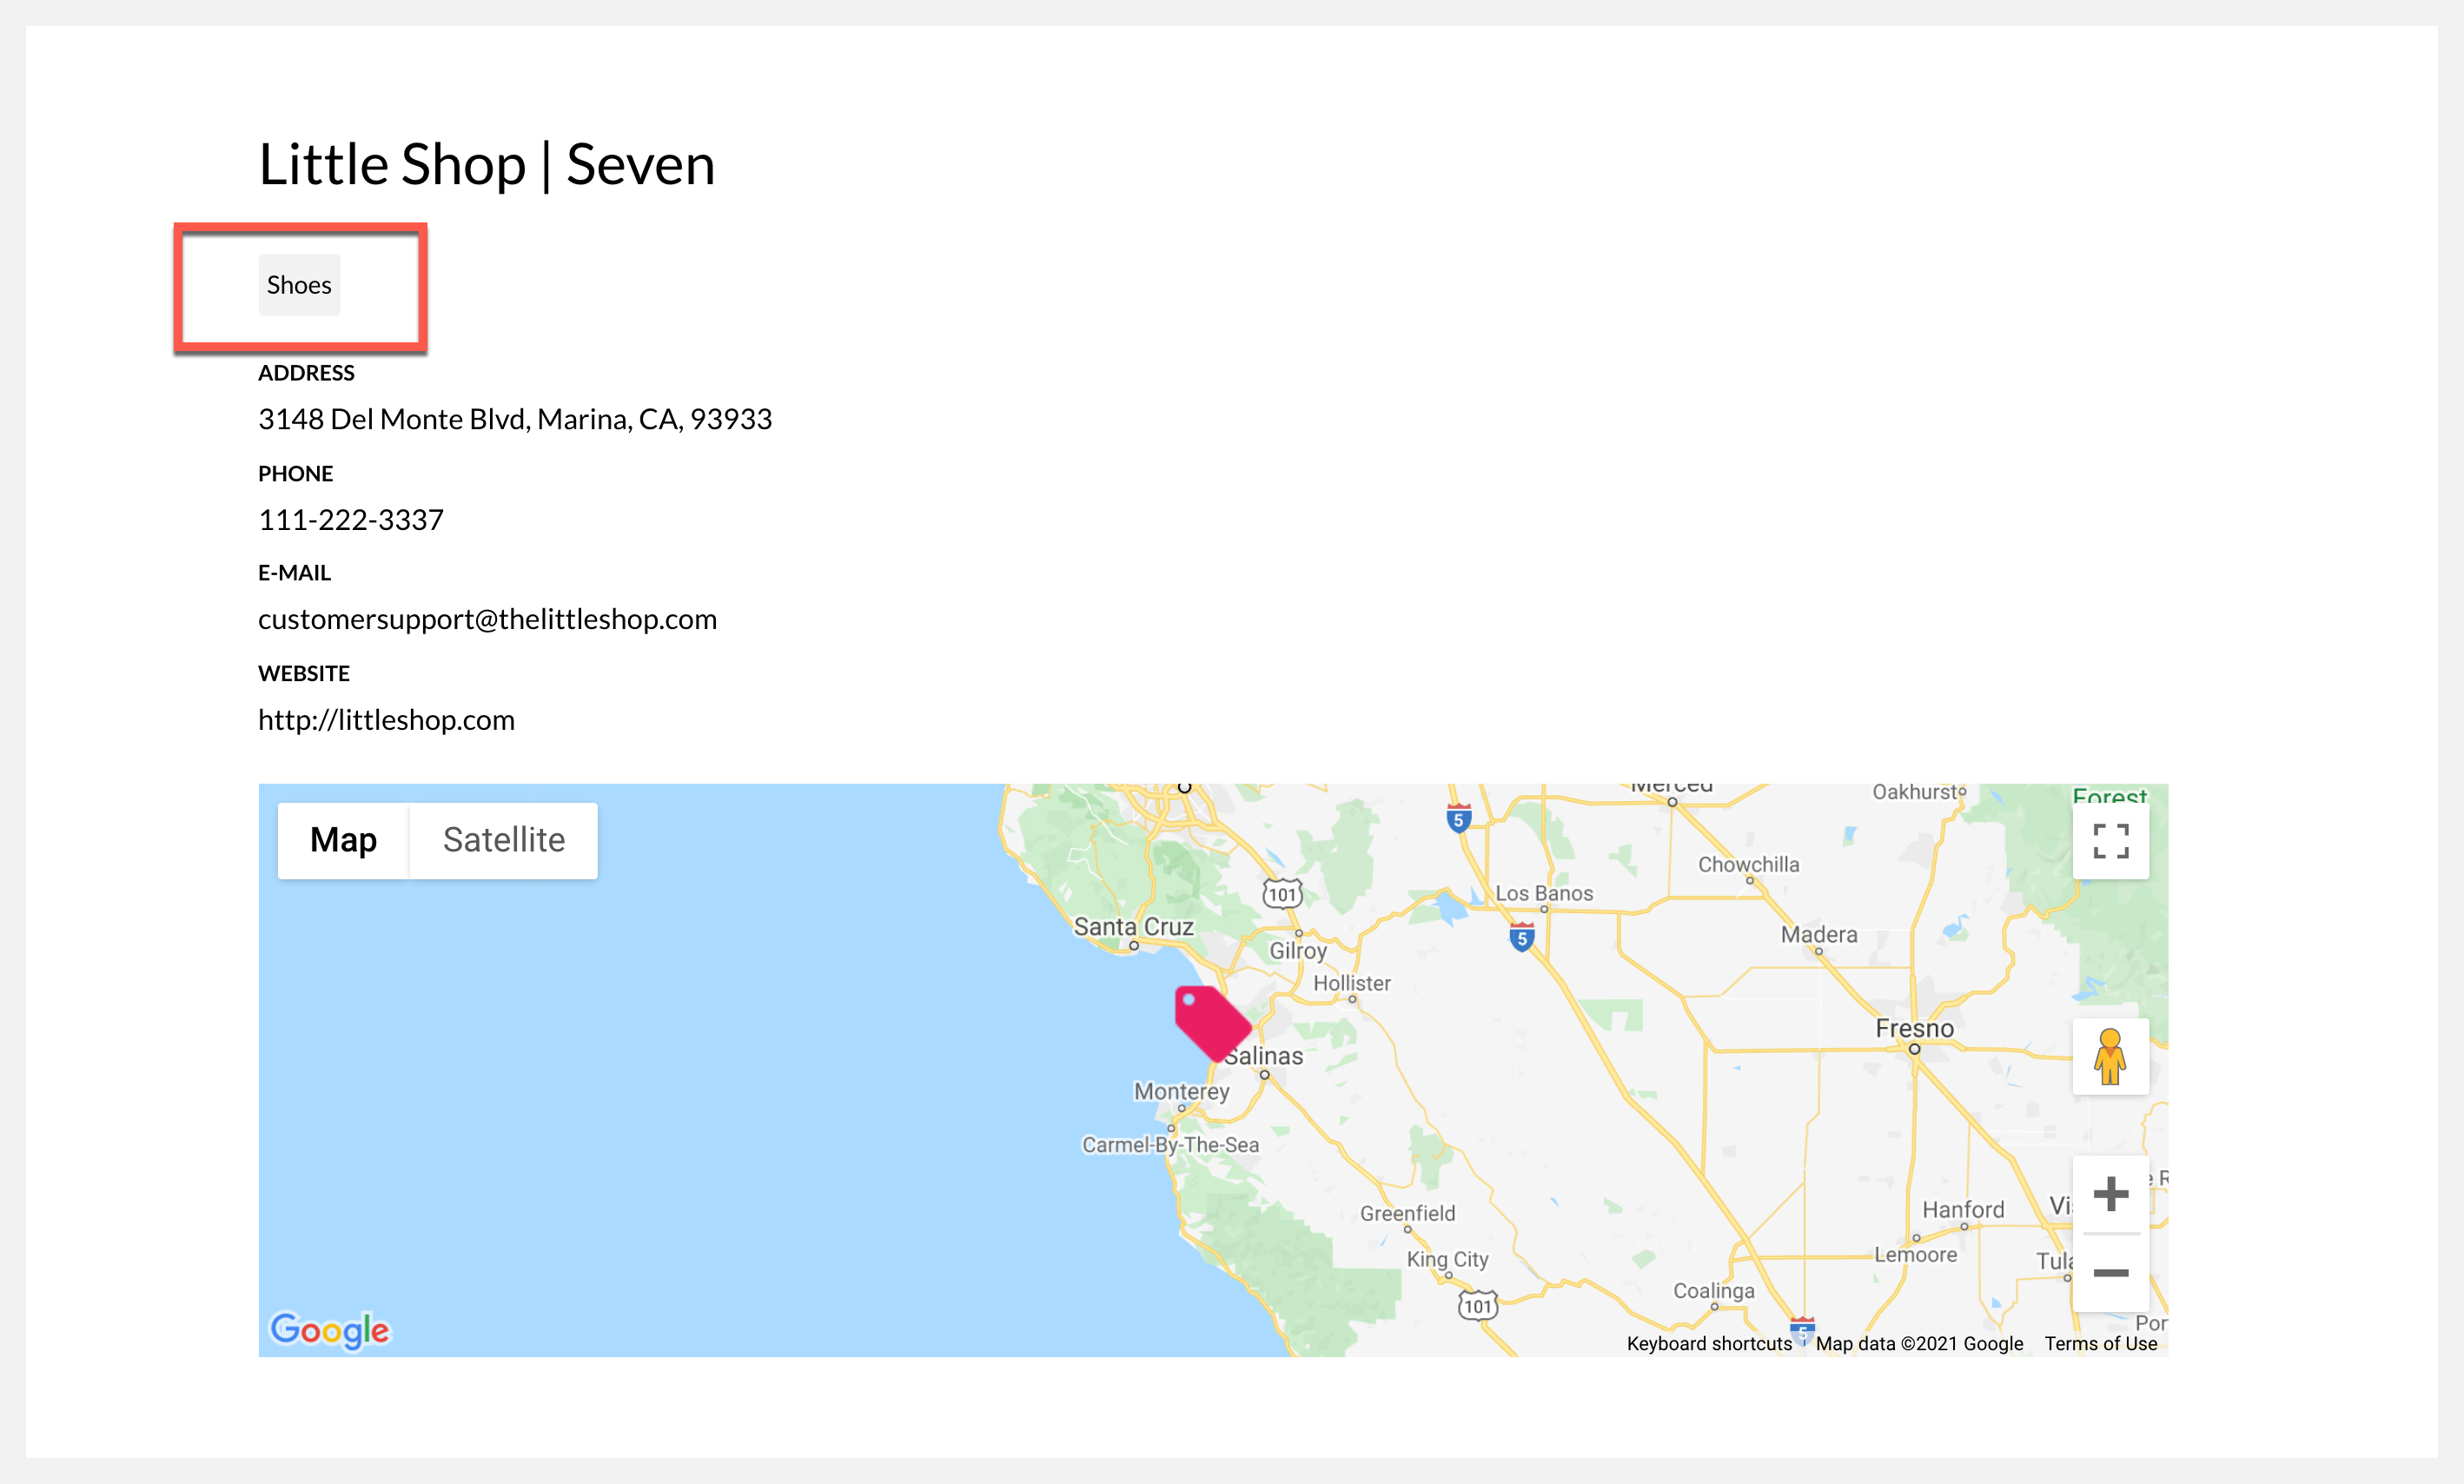
Categories can also be set on the individual store location by checking the desired category in the categories box.

In the example below the category “Shoes” has been assigned to show this location sells shoes.
Settings
General Settings
Google API Key- is required to use Store Locator. To find out how to get your Google API key follow the directions in the related article below.
Units– set the distance measurement with miles or kilometers
Distance- Set the distance radius for search parameters on the customer view
Search by Products- Enable this box to allow customers to search for locations based on product availability
Search by Store Name- Enable this box to allow customers to search for store location by name
Set a Default Location- Set the location of the home store
*Select Save changes to update enable changes to any of the general settings.
Importer
CSV Importer

-
- Bulk Import- To import many locations at one time from your WordPress dashboard go to Tools > Import.
- Press “WooCommerce Store Locator (CSV)”. You will be taken to an import page.
- Press Choose File and select your import file. Press Upload file and import to start the import.
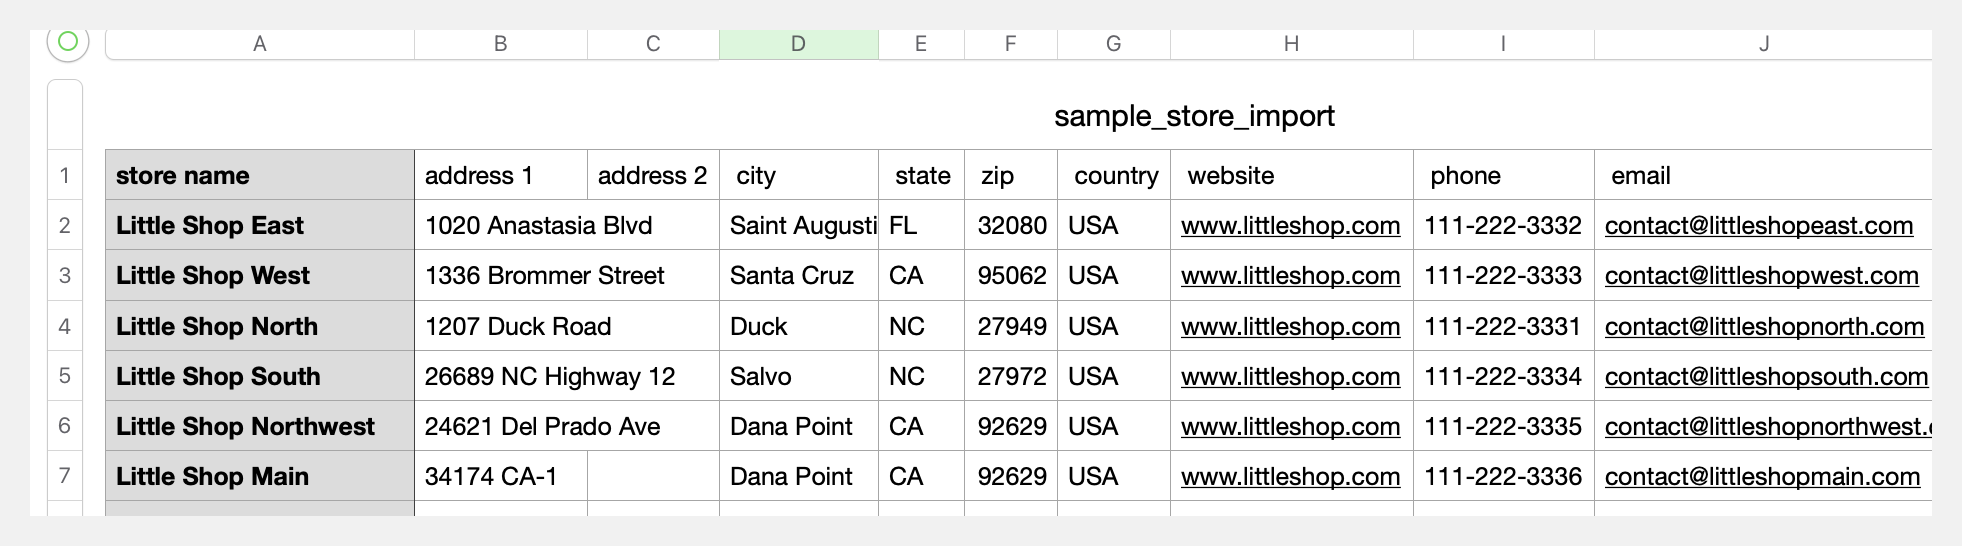
- Upload a CSV file with all desired store locations. Use the sample CSV template available on the tab to structure your data correctly.
- When the import is done a summary page will be shown. Review the page for any skipped rows.
Below is a sample CSV showing the correct format to upload your store locations.
Geocode Address – Enable this feature to have Google import the longitude and latitude of each location
Upload File– Select the CSV file to upload
*Select Save Changes to enable recently imported store locations.
Map Marker Icons
WooCommerce Store Locator comes with 16 icons that can be downloaded to your media and assigned to store locations. To use the preloaded icons simply select import on the desired icon and it will be added to the media library.
*Be sure to select Save Changes after importing all of the desired icons.
![]()
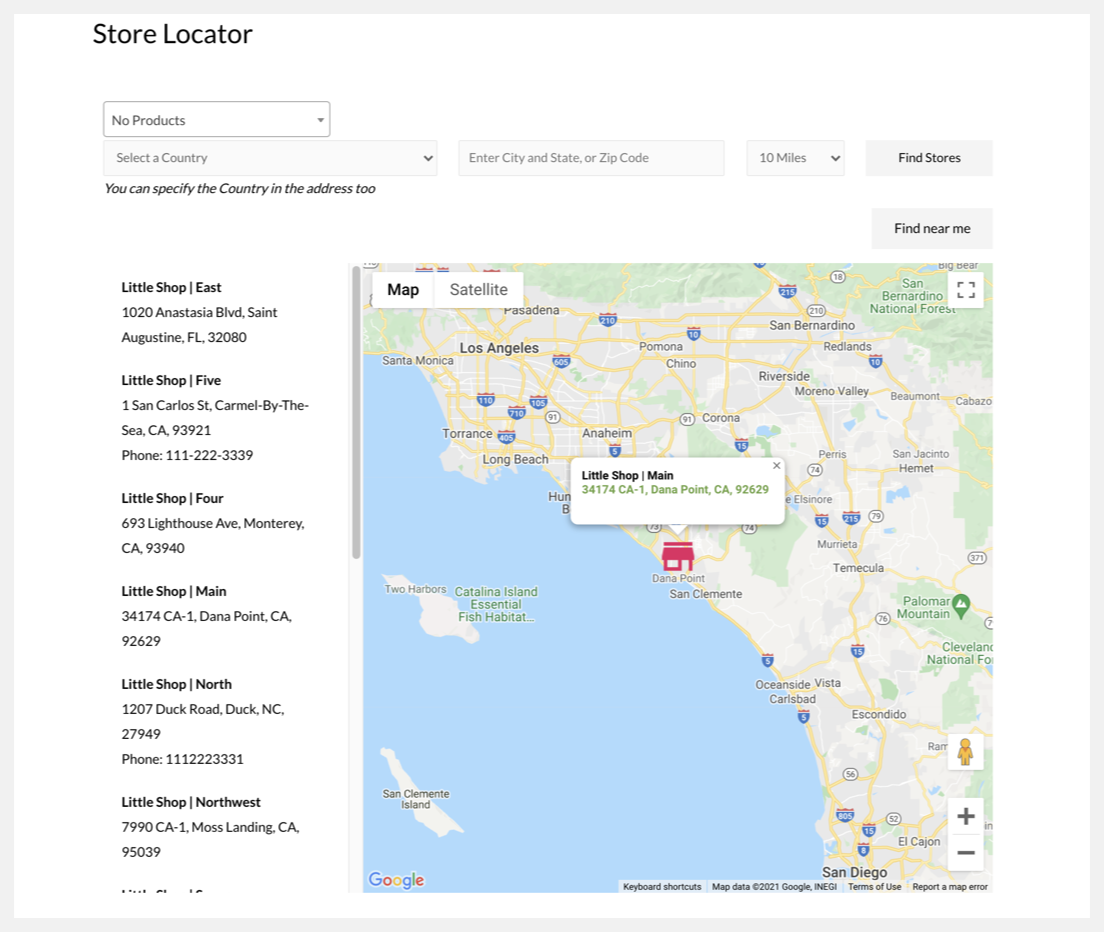
What the Customer Sees
This page will show a search form, a list of locations, and a map showing your locations. Customers can search for locations by entering an address or zip code and pressing Find Stores. Alternatively, customers can select a product from the dropdown list to search for the store location.
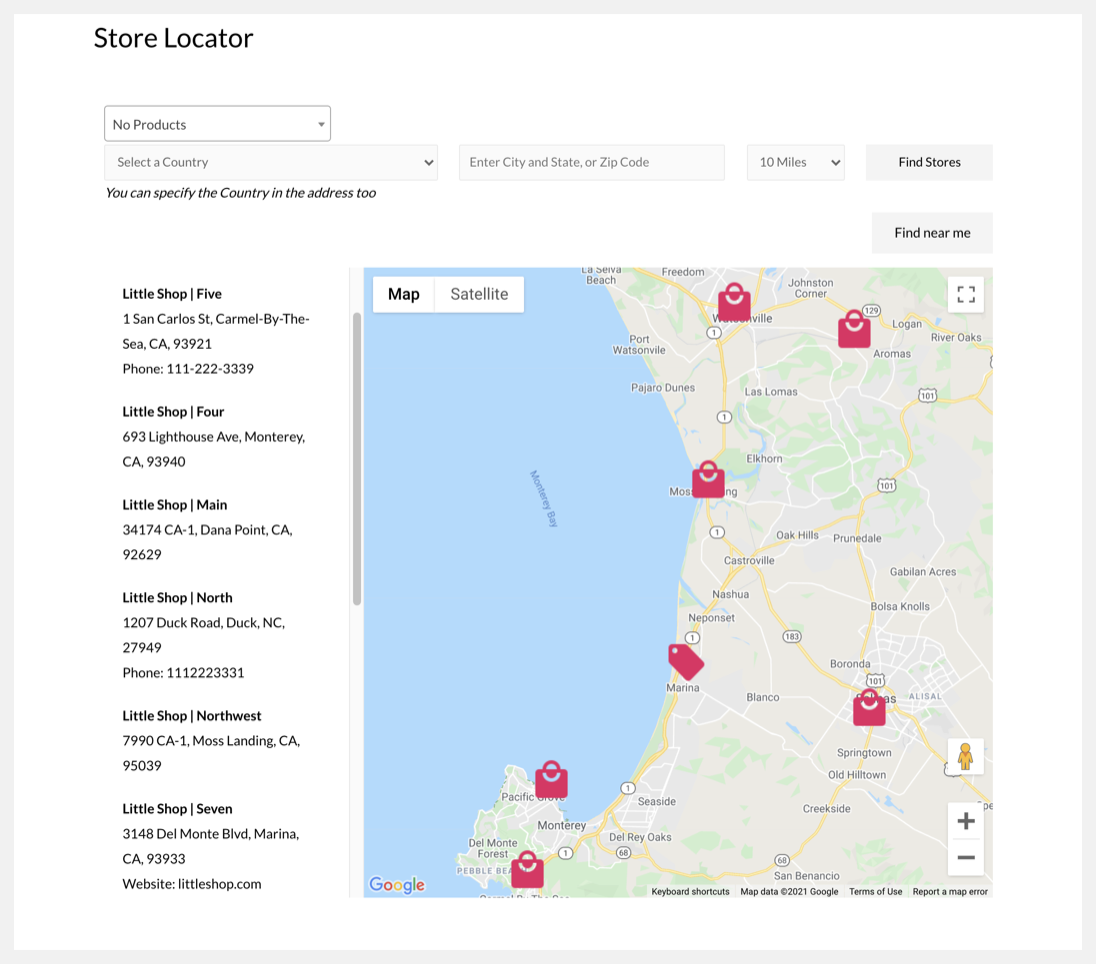
Customers can click on a store and a popup will appear with the store details.
Use Shortcode to List Stores
The shortcode takes a parameter that changes the display on the page to a list of stores. The shortcode [woocommerce_store_locator page=list] can be added to any page to show a list of stores only with no search option.

Frequently Asked Questions
- Why is my CSV getting an error when I try to import?
The CSV needs to have the exact number of columns as shown in the template file. If there are any blank columns without titles you will receive an error when trying to import the CSV list.