
This documentation is for the WooCommerce Advanced Notices plugin.
Installation
From the WordPress admin dashboard:
- Hover over the menu option Plugins, then click on Add New.
- Press the Upload Plugin button.
- Press Choose File and select the woocommerce-advanced-notices.zip file.
- Press Open, then press Install Now.
- If the load worked press Activate Now.
If you want to install by uploading directly to your site:
- On your local machine unzip the woocommerce-advanced-notices.zip file.
- Log in to your site using FTP or SFTP.
- Upload the extracted folder to the wp-content/plugins/ directory on your site.
- Go to the WordPress Plugins dashboard and Activate the plugin.
Add license
After the plugin is activated go to the plugins page and find the License area under WooCommerce Advanced Notices.

Copy your license key from the My Account area on ShopPlugins.com or from your order confirmation email then paste it into the “Your license key” field. Press enter to activate it. A successful activation will look like this:

Configuration
From the plugins page click on the Settings link under WooCommerce Advanced Notices. To access the settings page later you can go to WooCommerce > Settings, then click on the Notices tab.
Notices

Check the Enable option to turn use the features of the plugin. Unchecking the option will keep all settings and notices defined, but notices will not be sent.
Check the Debug Log option to save notice events and debug data to the WooCommerce Logs area.
Slack Notifications
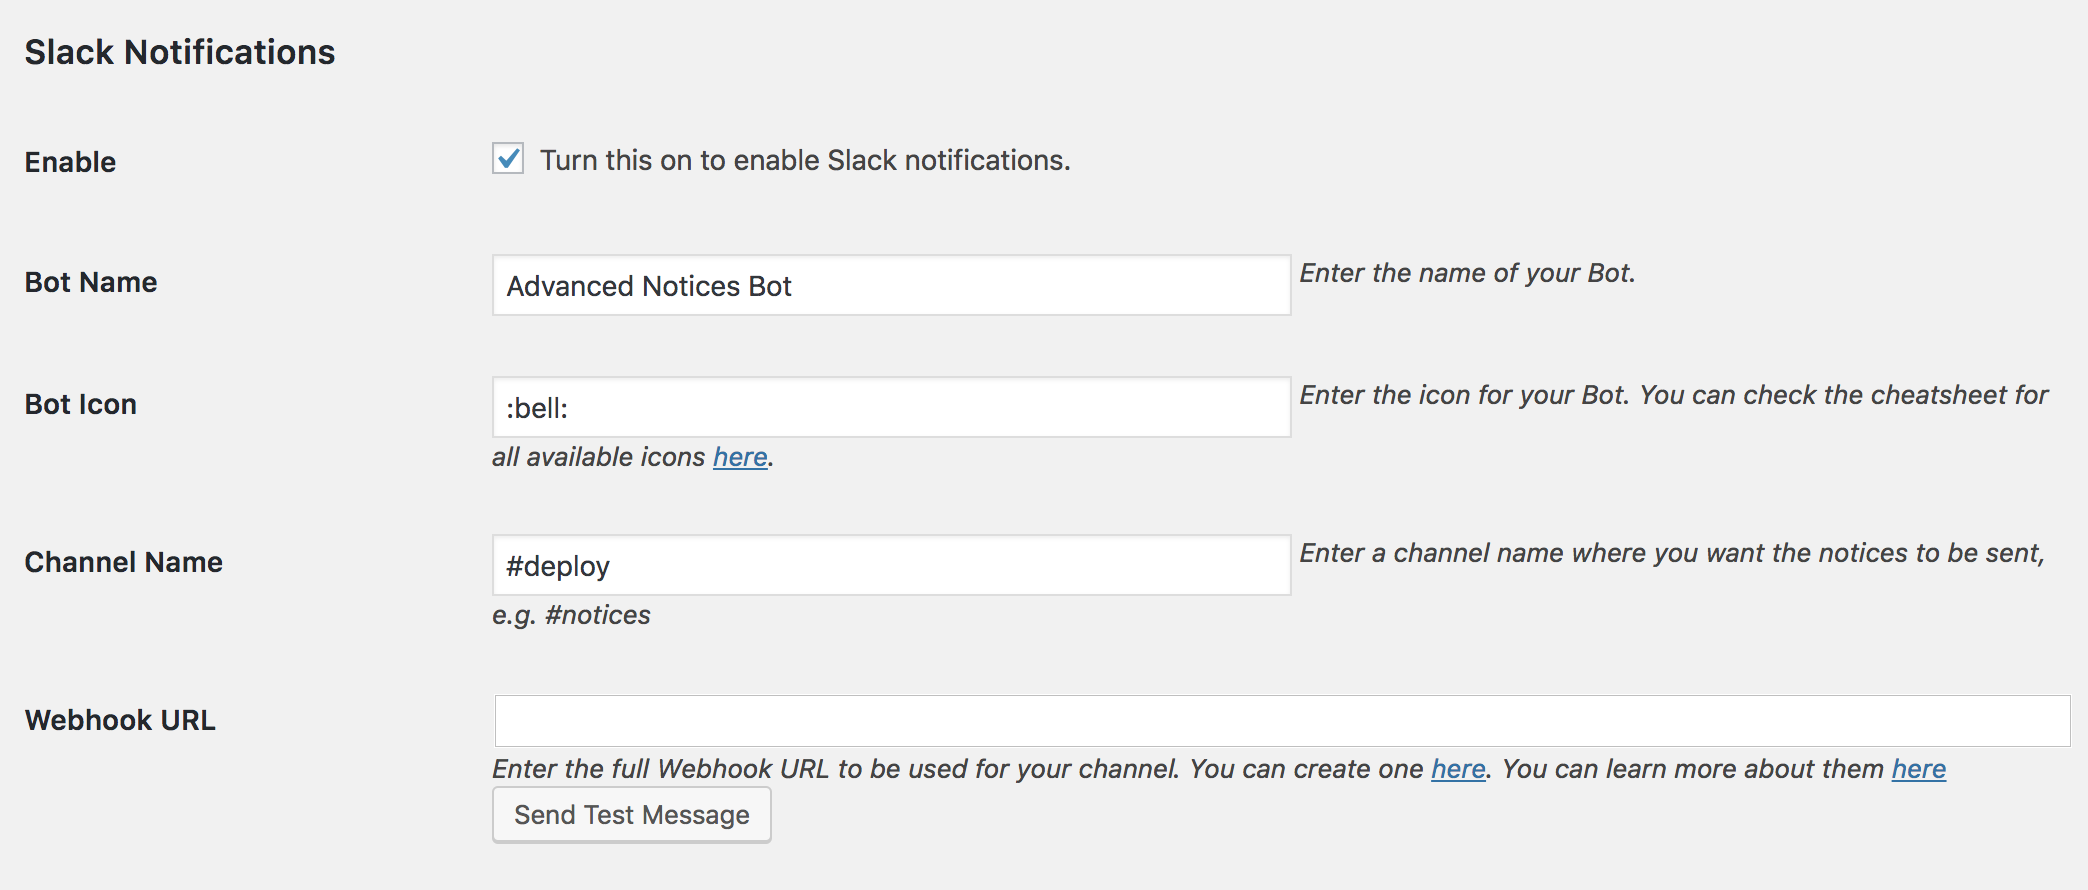
The Slack Notifications area is where you can add Slack credentials that will be available to all notice. These can be overridden at the individual notice level.
Click the Enable checkbox to enable Slack notifications. Add a name of the bot that will be shown in the Slack channel. Select an icon that will be associated with the Slack bot. Then select a channel that the notification will be posted to.
Finally get a webhook URL that will be used to post messages from your WooCommerce store to Slack. You can create a webhook URL using this documentation.
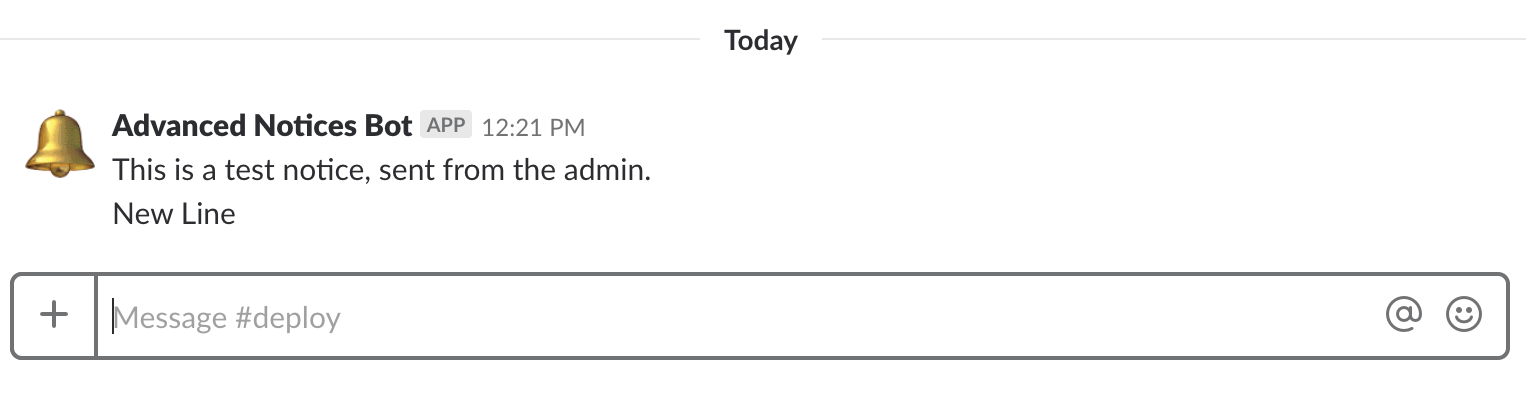
Press the Send Test Message button to verify the Slack credentials. Below is an example notification.
Notices List
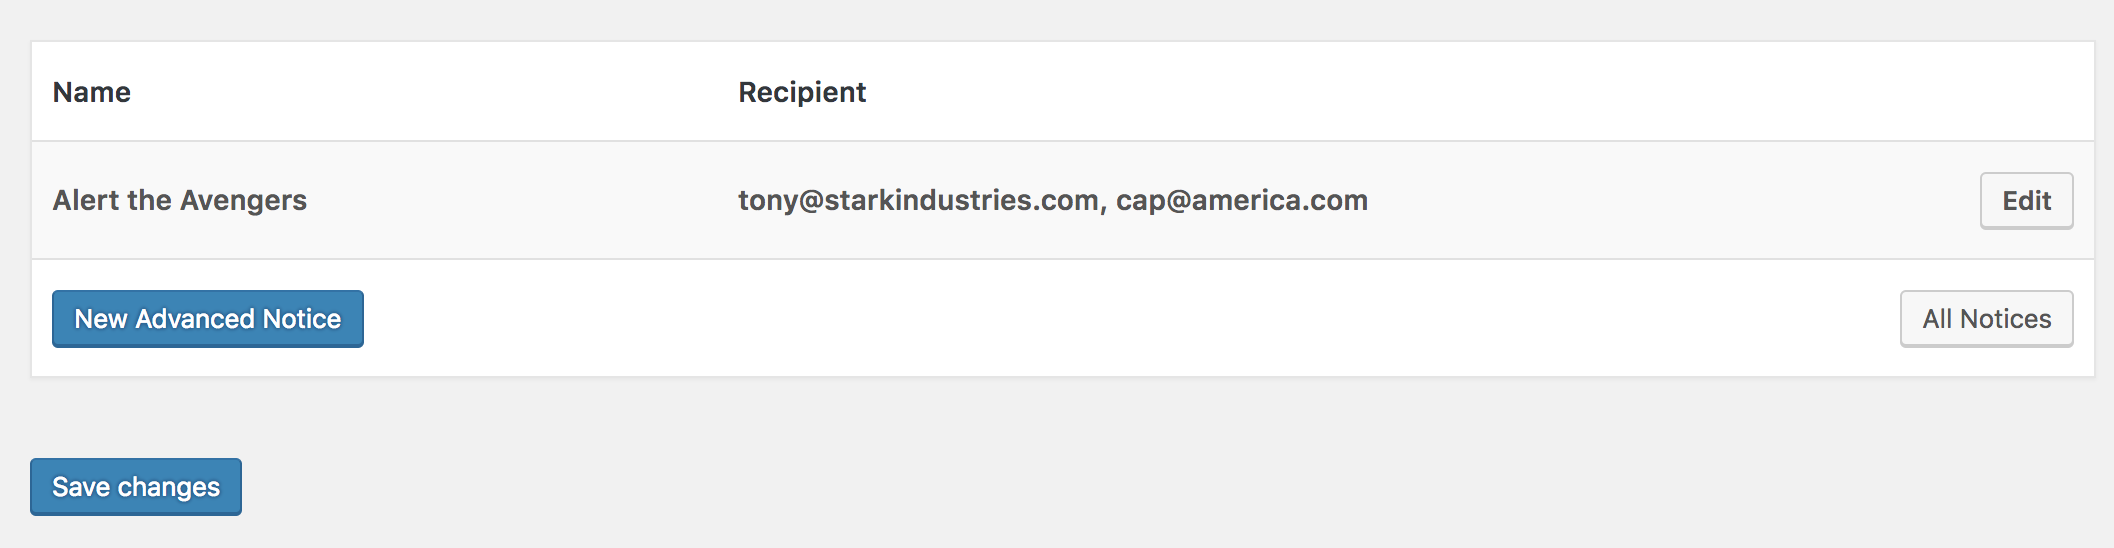
The last part of the settings page is a table showing the most recent notices added to the site. Press New Advanced Notice to add a notice. Press All Notices to see a full list of notices.
Add a Notice
To add a notice press New Advanced Notice.
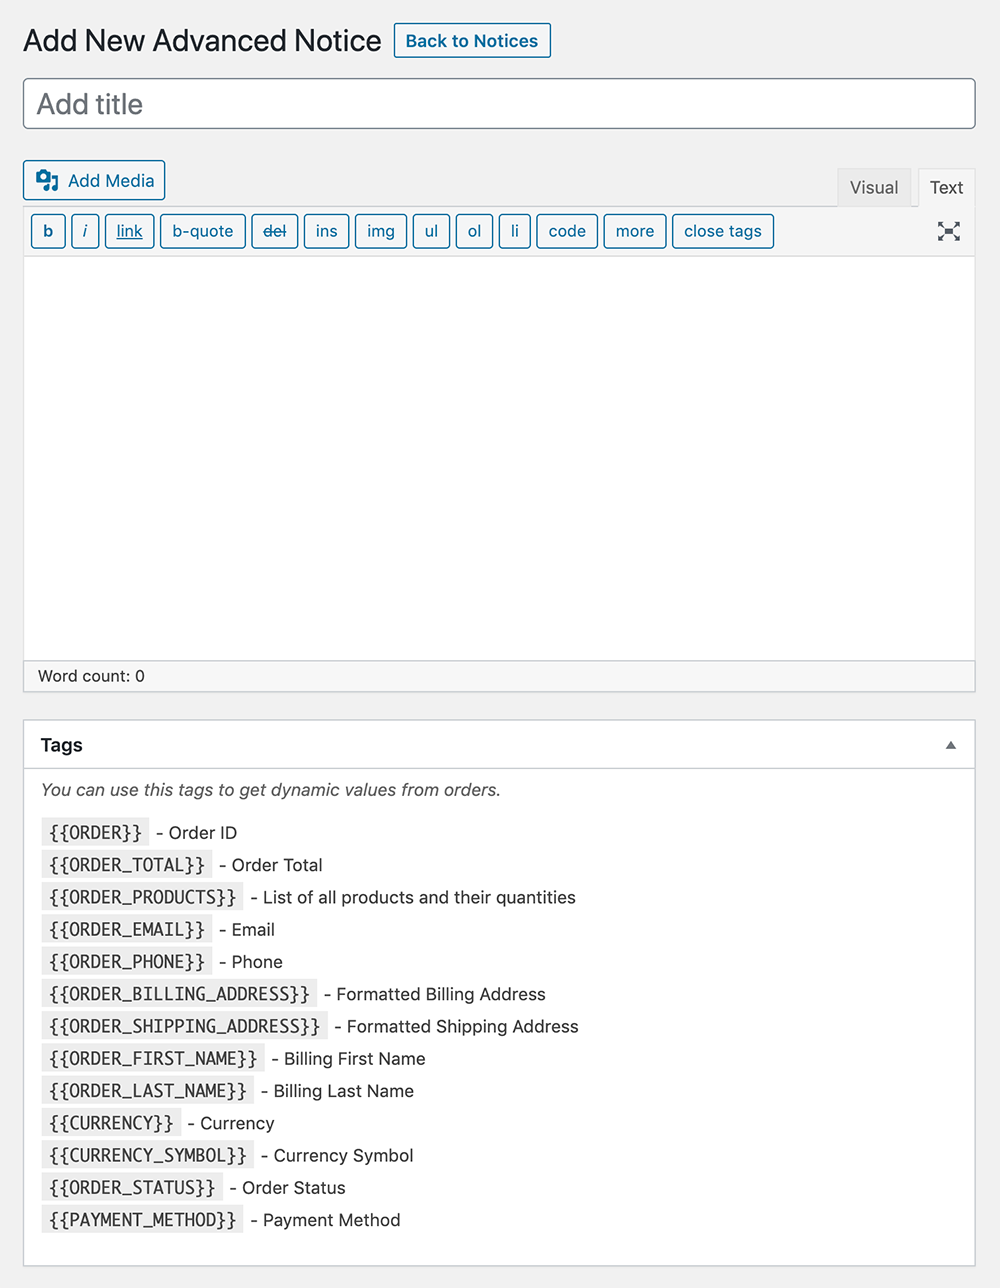
- Add a title for the notice. This will only be visible to the store administrator.
- Add content of the message. Tags can be used to add dynamic text from the WooCommerce order.
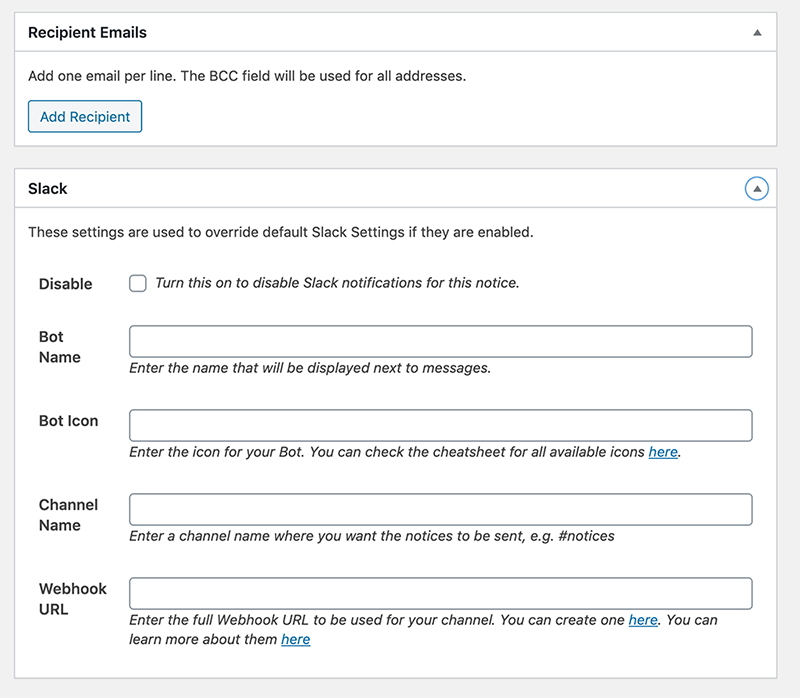
3. Optional: Add recipient email addresses. Each email will be added to the BCC field.
4. Optional: Add settings to send a message to Slack.
- Bot Name: Select the name to be shown next to Slack messages.
- Bot Icon: Select the icon to be shown next to the message. Available icons are here.
- Channel Name:
- Webhook URL: Where to deliver the message. You can learn more about creating Slack Webhooks here.
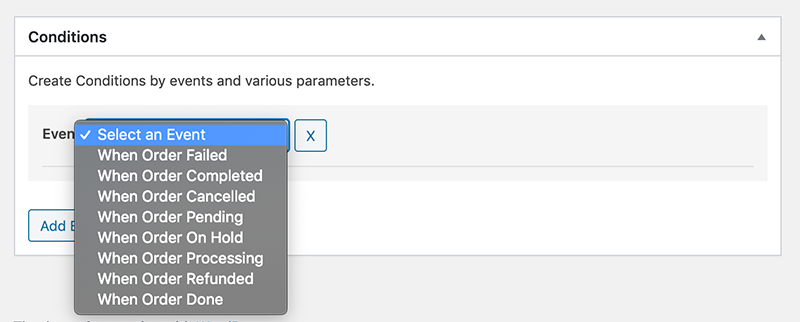
Add Conditions
A notice can be triggered by one or more events. Each event can contain one or more conditions.
- Select an event from the list.
- Press Add Condition.
- Select a Condition from the list.
- Some conditions require additional information.
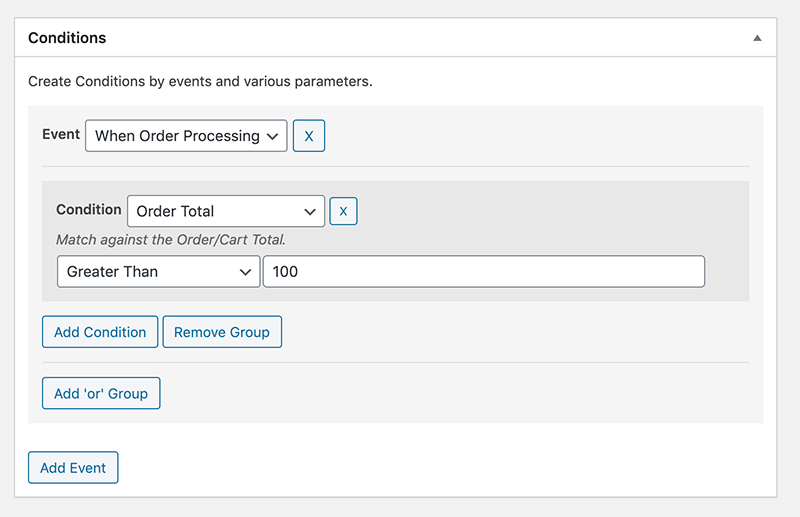
In the following example the notification will be sent when an order goes to “Processing” status, and the Order Total is greater than $100 (or local currency).
Add Digest
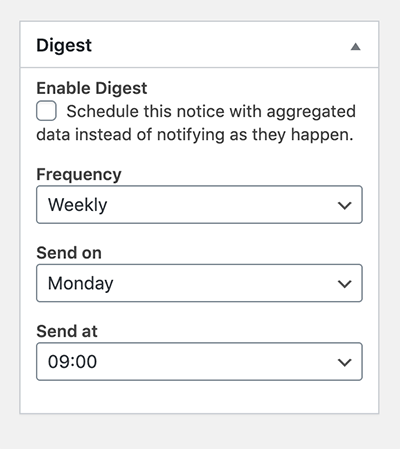
Click the “Enable Digest” option to receive all occurrences of this notice at one set time.
- Select a Frequency, either Weekly or Monthly.
- Select a date to send, from Monday to Sunday.
- Select a time for the notice to be sent at.